Unit 6: Managing Applications
Operator |
Operation Location |
|---|---|
OU Administrator |
EnOS Application Portal > Admin Console |
The custom applications in the EnOS Application Portal mainly come from the following sources:
Applications created or obtained in the Developer Portal
Application shortcuts created based on custom applications in the Admin Console
This unit introduces how OU administrators manage applications in the Admin Console of the application portal, including:
Managing applications created or obtained in the Developer Portal and configuring their menu groups, interface permissions, etc.
Creating and managing application shortcuts, and configuring their menu groups, operational permissions, etc. (Optional)
Note
This unit uses the “Monitoring Center” application as an example, which is created in the [Creating a Visualization Monitoring Application] tutorial. OU administrators can create this application according to Create An Application , or refer to this unit to use other existing applications in the current OU for corresponding operations.
Step 1: Managing Menu Groups
Menu Groups are collections of application menus. Users with access permission to a menu group can access the various application menus within the group through the application portal.
Managing Menu Groups of Obtained Applications
Follow these steps to create and configure a menu group for the Monitoring Center application (i.e., a custom application created in the Developer Portal):
Log in to the EnOS Application Portal, click the Console icon
 in the upper right corner, and select Developer Console.
In the left navigation bar, select Application Management to open the application management page.
In the list on the application management page, hover over the row for Monitoring Center and select Manage Menu Group
 to open the menu group management page.
In the upper right corner of the left panel on the menu group management page, click the plus sign (+) to enter the name of the menu group, such as
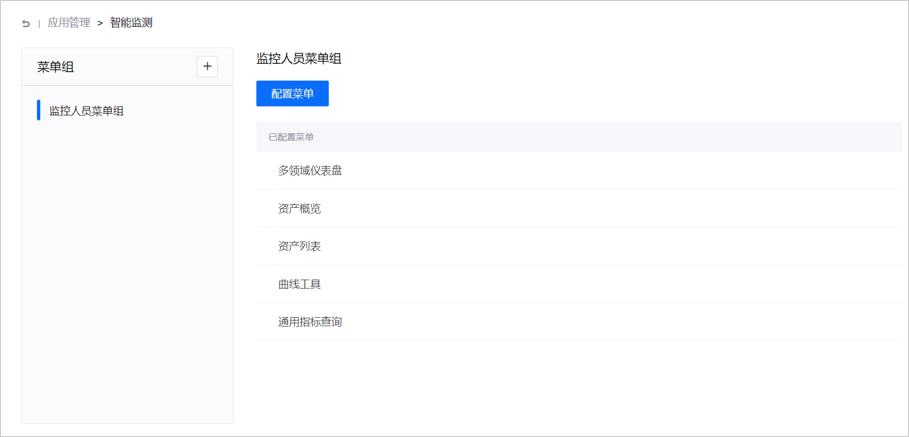
Monitoring Personnel Menu Group, and then select Submit.In the left panel, select Monitoring Personnel Menu Group, which was created in the previous step, and then select the Configure Menus button on the right.
In the pop-up window, add the following menus to the menu group and select Confirm:
Asset Overview
Asset List
Performance Report
Repeat the above steps to create another menu group named
Analyst Menu Groupand add the following menus:Faulty Devices
Regional Indicator Comparison
General Indicator Query
After completing the above operations, the OU administrator can view the following menu group information on the menu group management page of the Monitoring Center application.
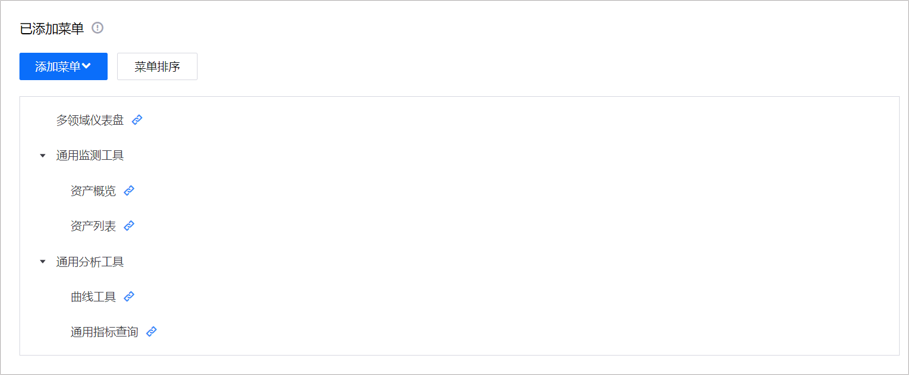
Managing the menu groups of application shortcuts is the same as managing the menu groups of obtained applications. Refer to the operation steps in Managing Menu Groups of Obtained Applications. Create a menu group named Comprehensive Menu Group for the Comprehensive Monitoring application (i.e., the application shortcut created in the Admin Console) and add the following menus:
Multi-domain Dashboard
General Monitoring Tools
Asset Overview
Asset List
General Analysis Tools
Curve Tool
General Indicator Query
For more information, see Managing Menu Groups.
Step 2: Assigning Organization Structures
To display the nodes, levels, or resource information of an organization structure in the application, such as allowing users to see the corresponding group, branch, and site nodes in the station filter of Monitoring Center > Asset Overview, the OU administrator needs to follow the following steps to assign an organization structure to the application:
In the left navigation bar of the Admin Console, select Application Management to open the application management page.
In the list on the application management page, hover over the row for Monitoring Center and select Assign Organization Structure
 .
.In the pop-up window, select Group, which is the organization structure created in Unit 5: Managing Organization Structures, and then select Confirm.
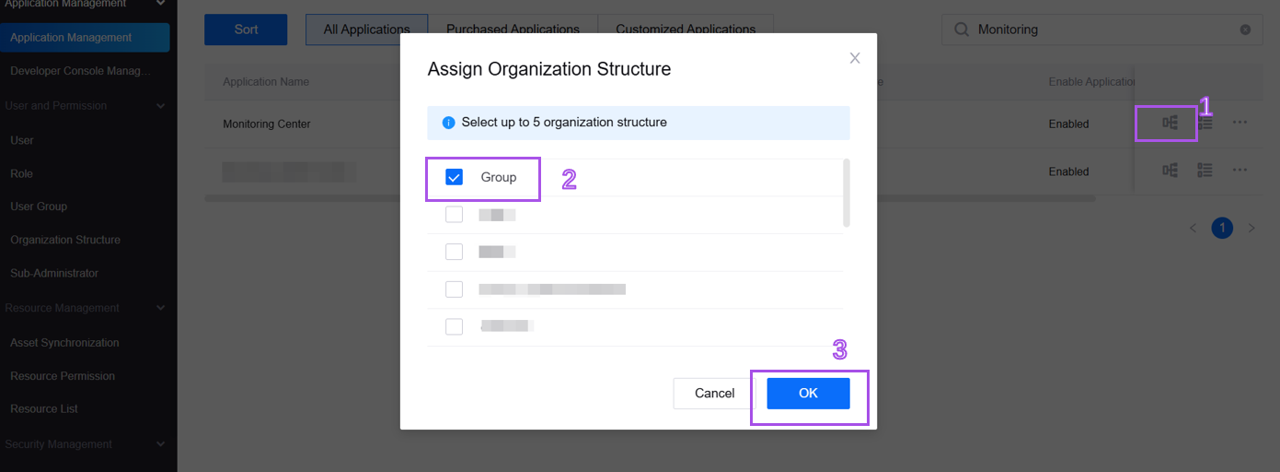
After completing the above operation steps, Monitoring Center can display the node, level, and resource information of the Group organization structure. For more information, see Assigning Organization Structures.
Step 3: Enabling the Application
After the above configurations, the OU administrator needs to follow the following steps to enable the application and display it in the left navigation pane of the application portal.
In the left navigation bar of the Admin Console, select Application Management to open the application management page.
In the list on the application management page, hover over the row for Monitoring Center and select Manage to open the application details page.
In the Application Settings section:
Select Enable Application to ensure that the functions and related APIs of the Monitoring Center application work properly.
Select Display the Application in the Navigation Pane to allow users with the corresponding menu group access permission to access the relevant menus of the Monitoring Center application in the navigation pane of the application portal.
In the Grant Application Permissions section:
Do not grant resource permissions: Ensure that the application cannot access any resources within the current organizational unit (OU).
Allow this application to get all resource permissions as an OU admin: Allow the application to access all resources within the OU, suitable for applications requiring comprehensive data access.
Allow this application to get the specified user’s resource permissions: Bind the application’s access permissions to the permissions of a specific user, allowing the application to access all resources that the user has permission to access.
For more information, see Enabling Applications and Displaying Applications on the Navigation Pane.
Step 4: Creating an Application Shortcut
An application shortcut is a special type of application that OU administrators build based on applications created or obtained in the Developer Portal. Application shortcuts can include multiple application menus and operational permissions, and are often used to integrate pages or features from other applications into an already created or obtained application. In the application portal, the configuration items for application shortcuts differ slightly from those of other applications. This unit will separately introduce how OU administrators manage application shortcuts and other applications.
Follow these steps to create a new application shortcut based on the Monitoring Center application:
Log in to the EnOS Application Portal, click the Console icon
in the upper right corner, and select Admin Console.In the left navigation bar, select Application Management. In the list on the application management page, hover over the row for Monitoring Center and select Create Shortcut to open the shortcut details page.
On the shortcut details page, select Edit to open the edit basic information pop-up window.
In the pop-up window, enter the following information.
Configuration Item
Description
Name
Enter the name of the application shortcut, such as
Comprehensive Monitoring.Application Category
Select the category of the application, such as
Comprehensive.Description
Enter the description of the application, such as
A comprehensive monitoring application created based on the intelligent monitoring application.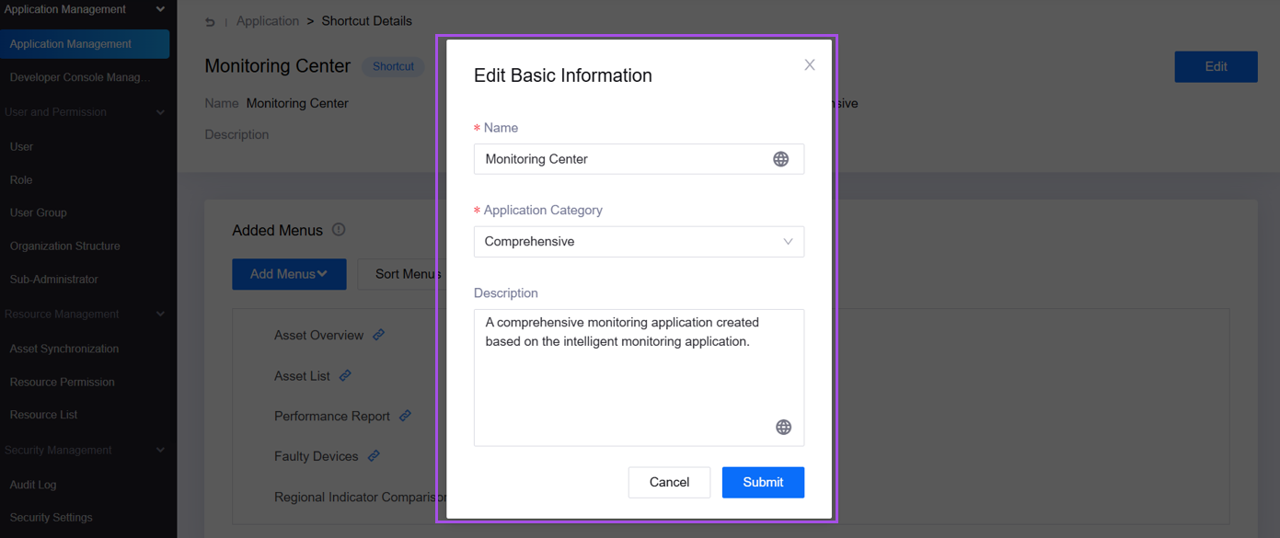
For more information about application shortcuts, see Managing Application Shortcuts.
Step 5: Managing Application Shortcut Menus
Application shortcuts inherit the menus and operational permissions of the original application, and also support adding empty menus for categorizing menus, menus from other applications, and operational permissions from other applications. OU administrators can adjust the menu structure of the application shortcut by creating top-level menus and adding application menus, grouping menus by function, source, or application scenario. Follow these steps:
In the left navigation bar of the Admin Console, select Application Management to open the application management page.
In the list on the application management page, hover over the row for Comprehensive Monitoring and select Manage to open the application details page.
Select Add Menu > Add Top-Level Menu to add 2 empty menus for categorizing menus to the application shortcut, and enter the following information in the pop-up window.
Name
URL
General Monitoring Tools
Leave blank.
General Analysis Tools
Leave blank.
Select Sort Menus and, in the pop-up window, drag and drop the menus to adjust the menu structure of the application shortcut in the following order and select Submit:
Regional Indicator Comparison
General Monitoring Tools
Asset Overview
Asset List
General Analysis Tools
Performance Report
Faulty Devices
Note
The operational permissions of application shortcuts also inherit from the original application and support adding operational permissions from other applications. OU administrators can refer to the above steps and Adding Operational Permissions to manage the operational permissions of application shortcuts.
After completing the above steps, the menu structure of the Comprehensive Monitoring application is shown in the following figure.