Unit 4: Managing Assets
Operator |
Operation Location |
|---|---|
Developer |
EnOS Application Portal > Developer Console, Admin Console |
This unit introduces how developers can synchronize assets that have been onboarded to the Developer Console to the Admin Console.
Step 1: Adding Tags
The EnOS Application Portal Admin Console can synchronize assets from the Developer Console that have specific tags. The key-value of these tags determines the asset type in the Application Portal. The Application Portal predefines the following tags and asset types, and also supports adding custom tags and asset types via Open API.
Tag |
Asset Type |
Description |
|---|---|---|
auth_unit : true |
Physical Asset |
Indicates that this asset is one or a group of physical devices, such as a photovoltaic inverter or a wind farm. In this tutorial, physical assets correspond to ‘device assets’ in the management console, which are individual devices within wind farms and solar power stations. |
logic_unit : true |
Business Asset |
Indicates that this asset is a group of physical devices with special business significance, such as all the lights on a floor. In this tutorial, business assets correspond to ‘logical assets’ in the management console, which include groups, branches, and various sites. |
In the EnOS Application Portal Developer Console, you can add tags to assets in the following ways:
Add tags to a single asset
Add tags to an asset tree node, where the corresponding asset will automatically receive this tag
Add tags to a model, where the assets in the model will automatically receive this tag
Method 1: Adding Tags to a Single Asset
Adding Tags to Device Assets
Log in to the EnOS Application Portal, click the Console icon
 in the upper right corner, and select Developer Console.
In the left navigation bar, select Device > Device Management > Device Assets.
In the device list, select View
 for the
 PV-1asset to open the asset details page.Select Edit
 in the Tag Information section to open the edit device tag popup.
In the popup, select Add+, enter the tag key
auth_unitin the left input box, and enter the tag valuetruein the right input box.Select Confirm.
Repeat the above steps to add the
auth_unit:truetag to the following device assets:PV-2
WT-1
WT-2
WT-3
WT-4
WT-5
WT-6
After completing the above operations, you can view the tags of this device asset in the Tag Information section of the device details page.

Adding Tags to Logical Assets
Log in to the EnOS Application Portal, click the Console icon
in the upper right corner, and select Developer Console.In the left navigation bar, select Device > Device Management > Logical Assets.
In the device list, select View
for the Groupasset to open the asset details page.Select Edit
in the Tag Information section to open the edit device tag popup.In the popup, select Add+, enter the tag key
logic_unitin the left input box, and enter the tag valuetruein the right input box.Select Confirm.
Repeat the above steps to add the
logic_unit:truetag to the following logical assets:East Branch
South Branch
Eastern Wind Farm 1
Eastern Solar Power Station 1
Southern Wind Farm 1
Southern Wind Farm 2
After completing the above operations, you can view the tags of this logical asset in the Tag Information section of the logical asset details page.

Method 2: Adding Tags to Asset Tree Nodes
Log in to the EnOS Application Portal, click the Console icon
in the upper right corner, and select Developer Console.In the left navigation bar, select Device > Device Management > Asset Tree.
At the top of the page, select the
Groupasset tree, and in the topology list on the left side of the asset tree tab, select theGroupasset.In the asset summary information on the right side of the page, select Edit
in the Tag Information section to open the edit device tag popup.In the popup, select Add+, enter the tag key
logic_unitin the left input box, and enter the tag valuetruein the right input box.Select Confirm.
Repeat the above steps to add the appropriate tags to the following asset tree nodes.
Node
Type
Tag
South Branch
Logical Asset
logic_unit:trueEast Branch
Logical Asset
logic_unit:trueSouthern Wind Farm 1
Logical Asset
logic_unit:trueSouthern Wind Farm 2
Logical Asset
logic_unit:trueEastern Wind Farm 1
Logical Asset
logic_unit:trueEastern Solar Power Station 1
Logical Asset
logic_unit:truePV-1
Device Asset
auth_unit:truePV-2
Device Asset
auth_unit:trueWT-1
Device Asset
auth_unit:trueWT-2
Device Asset
auth_unit:trueWT-3
Device Asset
auth_unit:trueWT-4
Device Asset
auth_unit:trueWT-5
Device Asset
auth_unit:trueWT-6
Device Asset
auth_unit:true
After adding tags to the asset tree nodes, the associated assets will receive these tags. You can view the tags of this node in the Tag Information section.

Method 3: Adding Tags to Models
Note
Only private models can have tags added.
Log in to the EnOS Application Portal, click the Console icon
in the upper right corner, and select Developer Console.In the left navigation bar, select Device > Model Management > Models.
In the Private Models tab of the model list, select Edit
for the General Regionmodel to open the model details page.Select Edit
in the Tag Information section to open the edit device tag popup.In the popup, select Add+, enter the tag key
logic_unitin the left input box, and enter the tag valuetruein the right input box.Select Confirm.
Repeat the above steps to add the appropriate tags to the following models.
Model
Identifier
Tag
Generic Wind Farm
wf_general_001
logic_unit:trueGeneric Solar Power Station
ss_general
logic_unit:trueGeneric Wind Turbine
wind_general_001
auth_unit:trueGeneric Solar Panel
solar_general_001
auth_unit:true
After adding tags to the model, all assets under this model will automatically acquire the model’s tag information. You can view the tags of this model in the Tag Information section of the model details page.

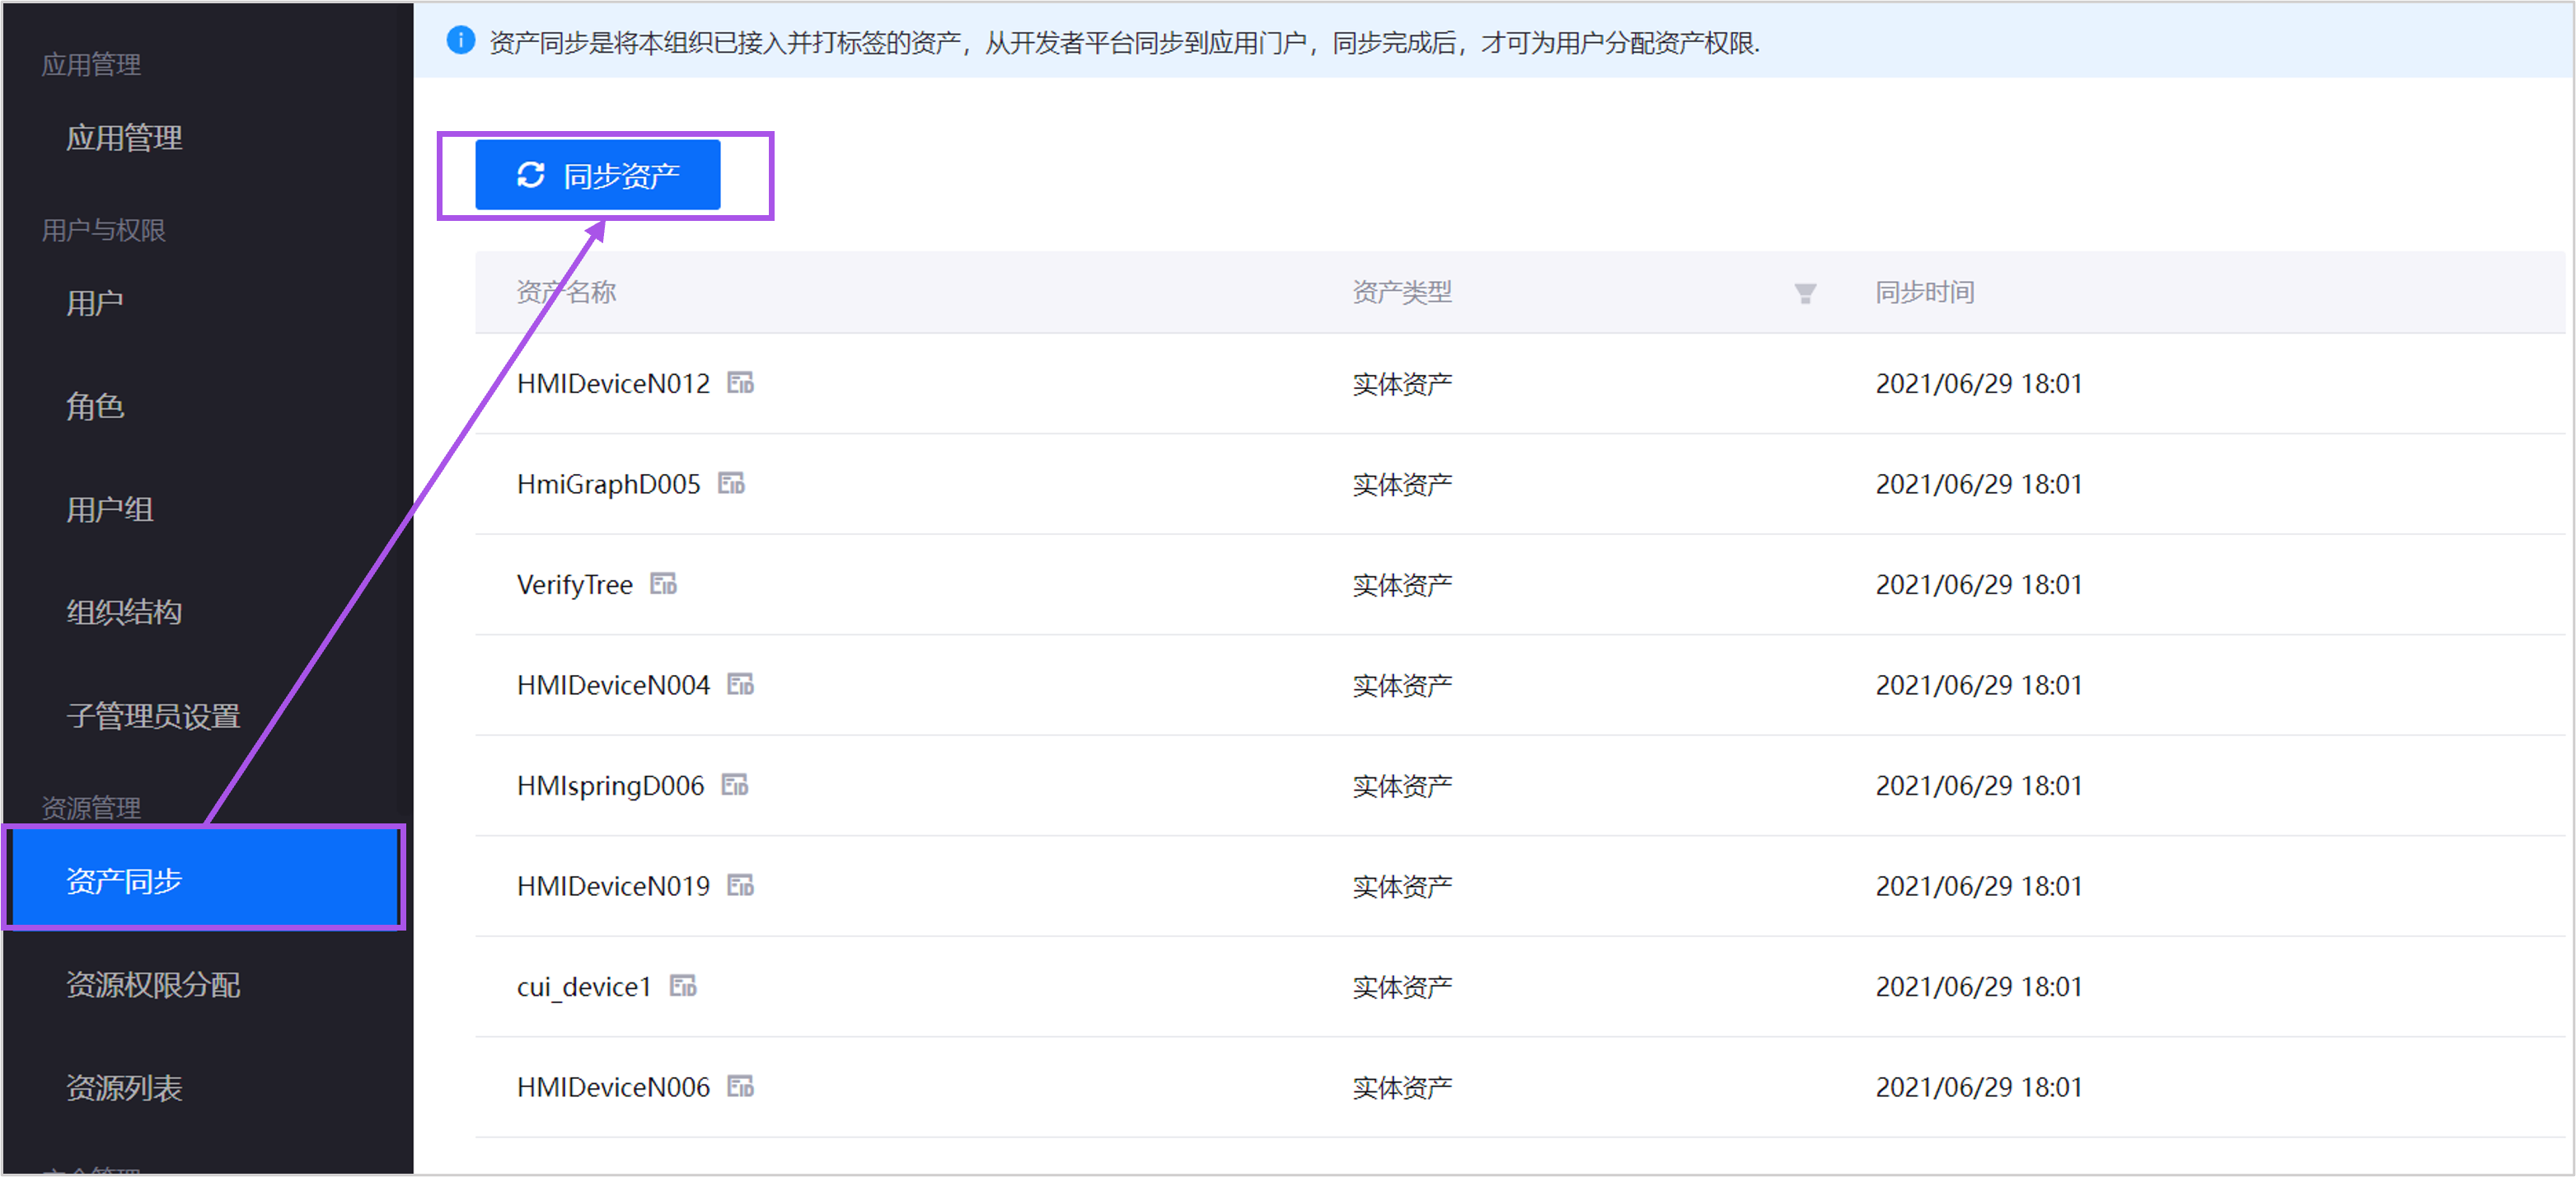
Step 2: Synchronizing Assets
Log in to the EnOS Application Portal, click the Console icon
in the upper right corner, and select Admin Console.In the left navigation bar, select Synchronize Assets. Assets with specific tags in the Developer Console can be synchronized to the Admin Console. OU administrators can then assign asset permissions to end users in the Admin Console.