Unit 5: Managing Organization Structure
Operator |
Operation Location |
|---|---|
OU Administrator |
EnOS Application Portal > Admin Console |
This unit explains how OU administrators can construct and manage organization structures in the EnOS Application Portal Admin Console to map real-world organizational hierarchies and asset relationships into EnOS.
Step 1: Creating an Organization Structure
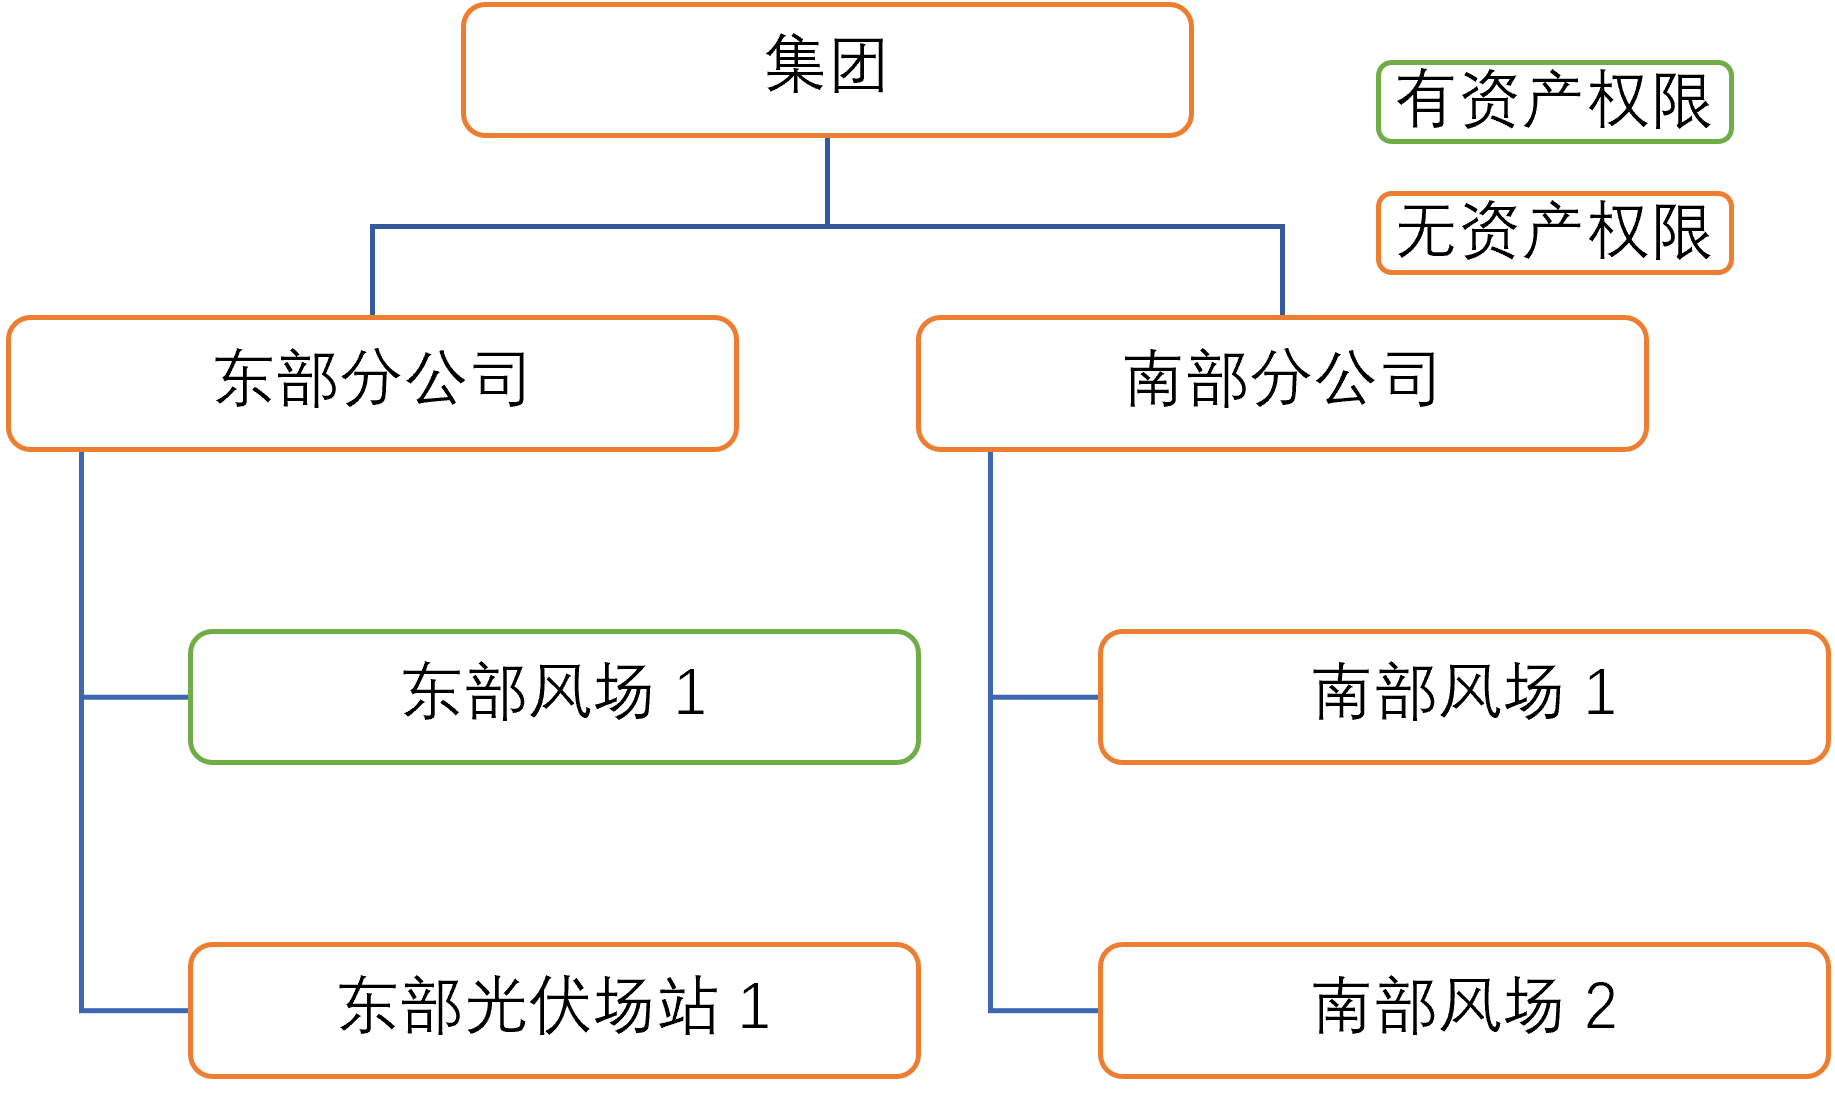
Organization Structure reflects the hierarchical framework of an organization and the hierarchical relationships between users and resources. In this tutorial, the OU administrator needs to create an organization structure by following the enterprise architecture diagram in the Scenario Description through these steps:
Log in to the EnOS Application Portal, click the Console icon
 in the upper-right corner, and select Admin Console.
In the left navigation pane, select Organization Structure to open the Organization Structure page.
Select New Organization Structure, enter the name of the new organization structure (e.g.,
Group) in the pop-up window, and select Submit.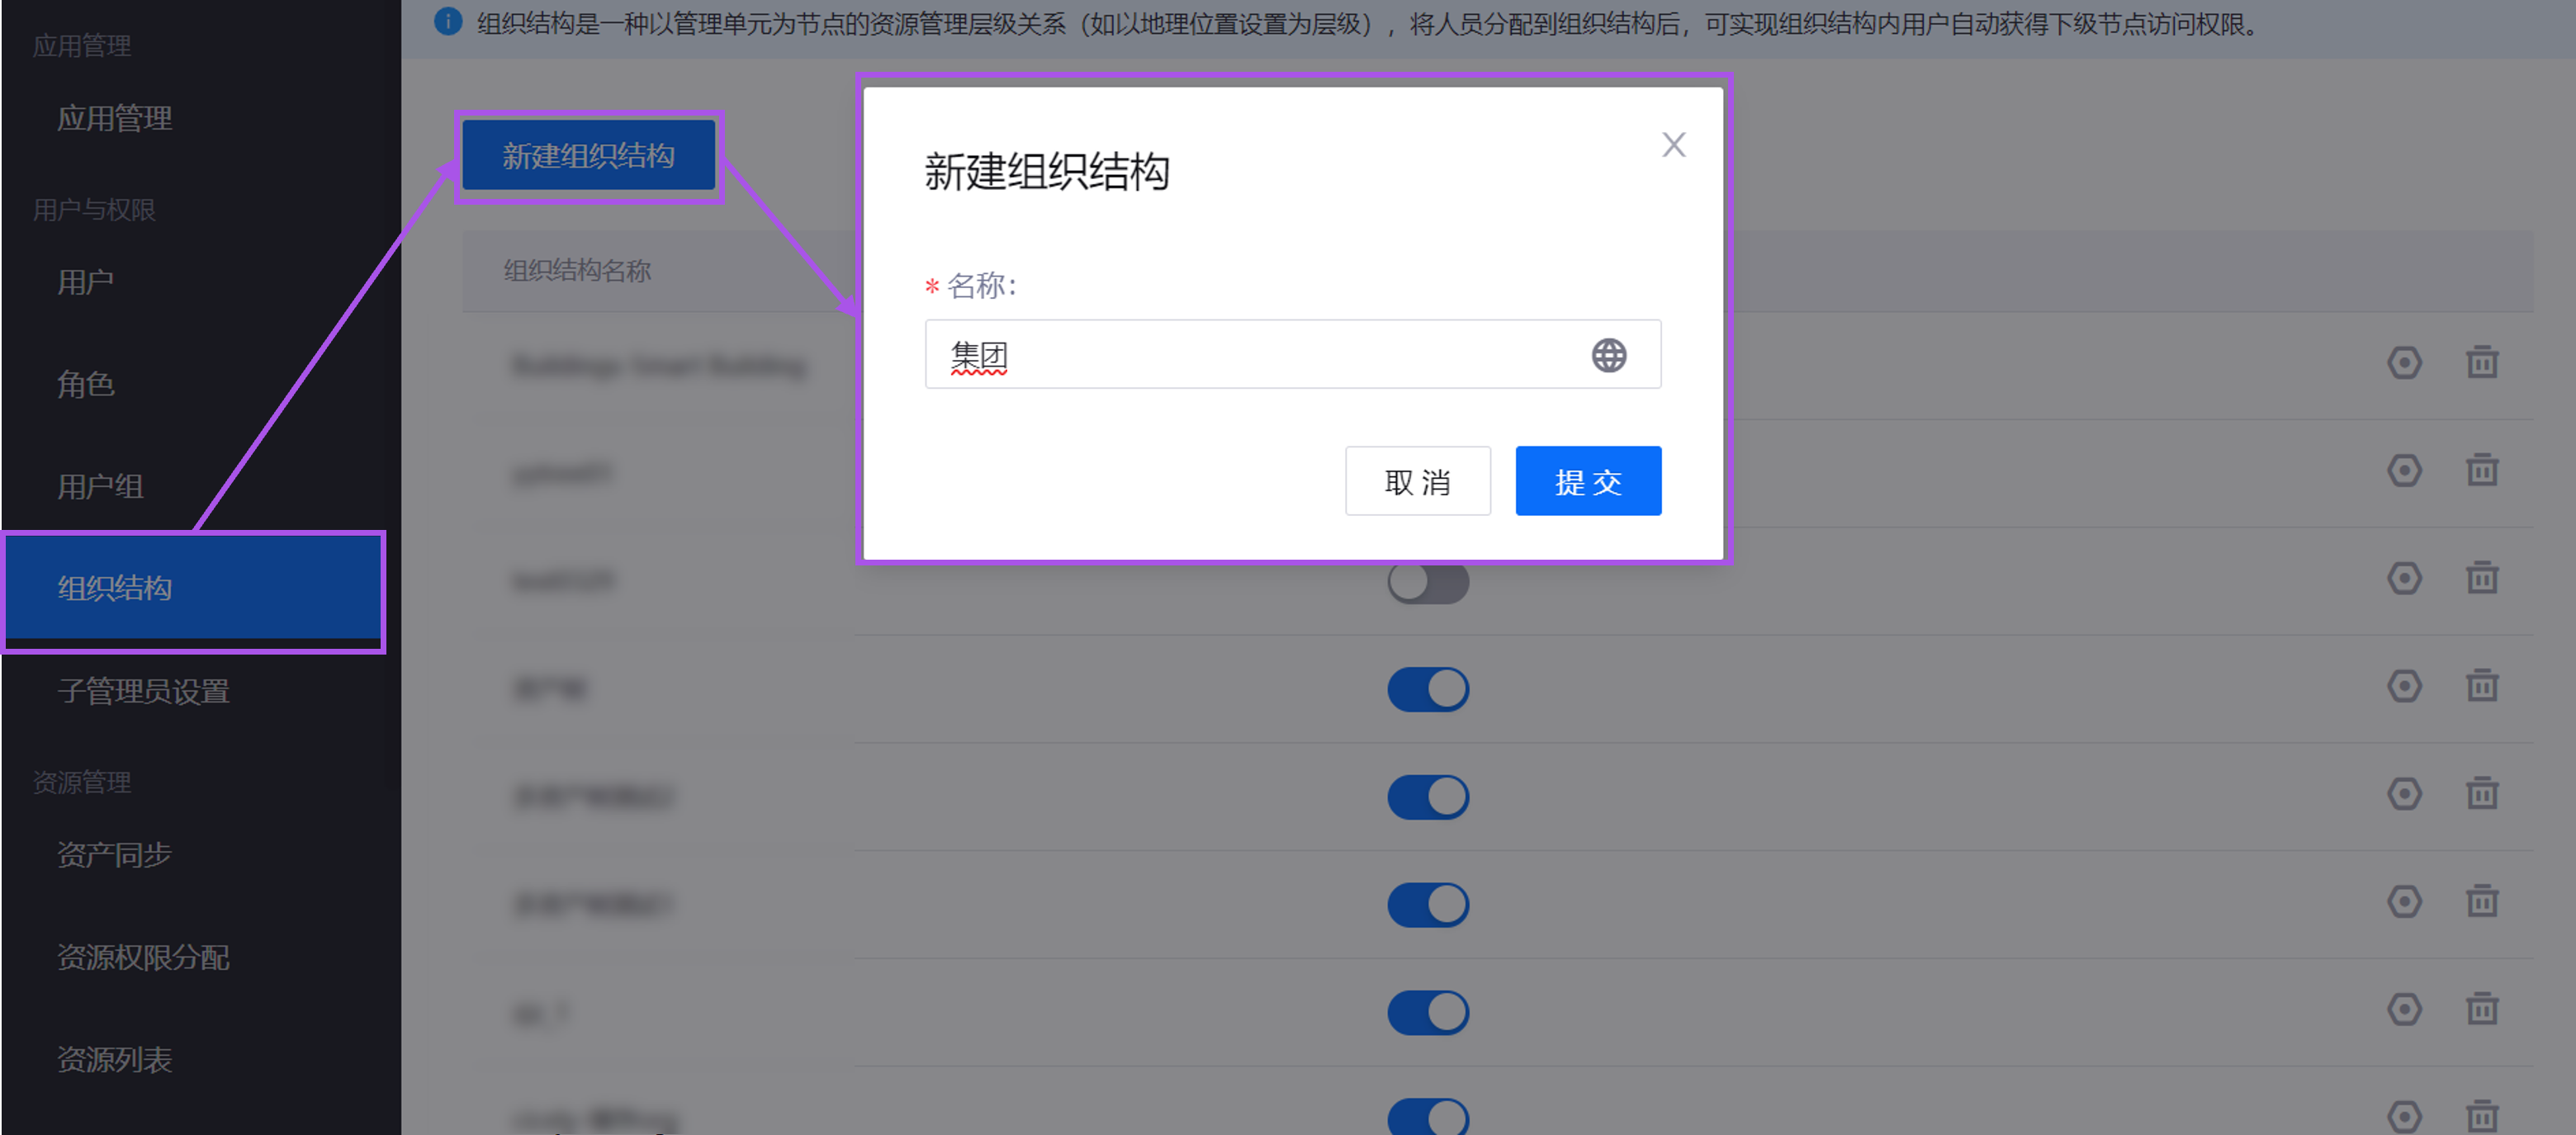
In the organization structure list, locate the newly created organization structure, select Manage
 on the right, and open the Organization Structure Details page.
Hover over the ellipsis (…) next to the root node (i.e., the Group node) of this organization structure and select Add Child Node to open the Add Node pop-up window.
Enter
East Branchin the pop-up window and select Submit.
Repeat the steps above to add the following nodes by referencing the enterprise architecture diagram in the Scenario Description.
Node Name
Parent Node
South Branch
Group
Southern Wind Farm 1
South Branch
Southern Wind Farm 2
South Branch
Eastern Wind Farm 1
East Branch
Eastern Solar Power Station 1
East Branch
After completing the above steps, the nodes and hierarchical relationships of the Group organization structure will be shown as below.
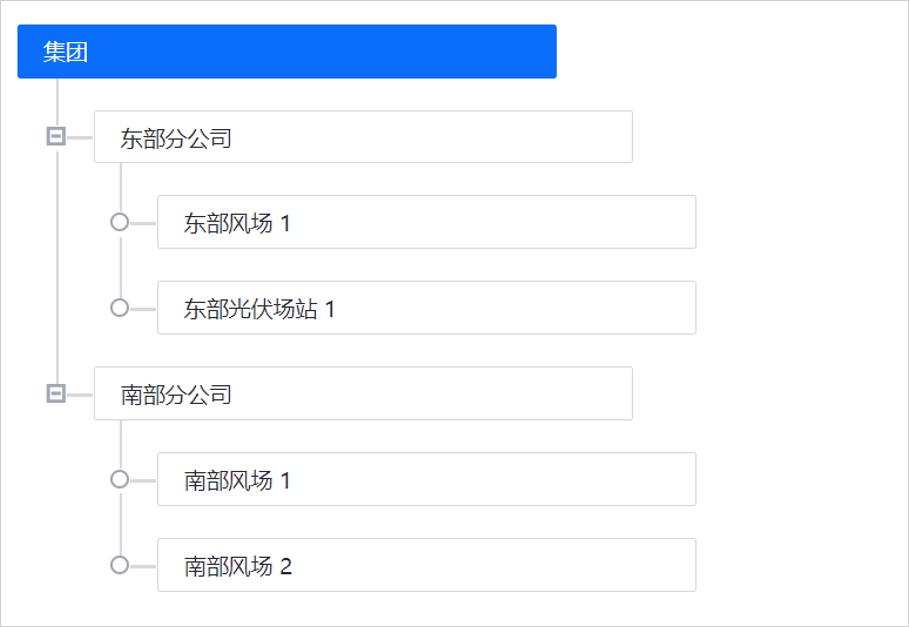
For more information, see Managing Organization Structure Nodes.
Step 2: Associating Resources (Optional)
After creating the organization structure and its nodes, follow these steps to associate resources with organization structure nodes to assign specific business meanings:
Note
Each organization structure node can only be associated with one resource.
In the left navigation pane of the EnOS Application Portal Admin Console, select Organization Structure.
Select Manage
for the Group organization structure to open the Organization Structure Details page.Select the Group node, then choose Associate Resource on the right side of the Organization Structure Details page.
In the Select a Type field on the left, choose Business Resources, and in the Search by Resource Name field on the right, select
Group, then select Submit.Repeat the steps above to associate the corresponding resources with the following organization structure nodes.
Node Name
Resource
Resource Type
East Branch
East Branch
Business Asset
South Branch
South Branch
Business Asset
Southern Wind Farm 1
Southern Wind Farm 1
Business Asset
Southern Wind Farm 2
Southern Wind Farm 2
Business Asset
Eastern Wind Farm 1
Eastern Wind Farm 1
Business Asset
Eastern Solar Power Station 1
Eastern Solar Power Station 1
Business Asset
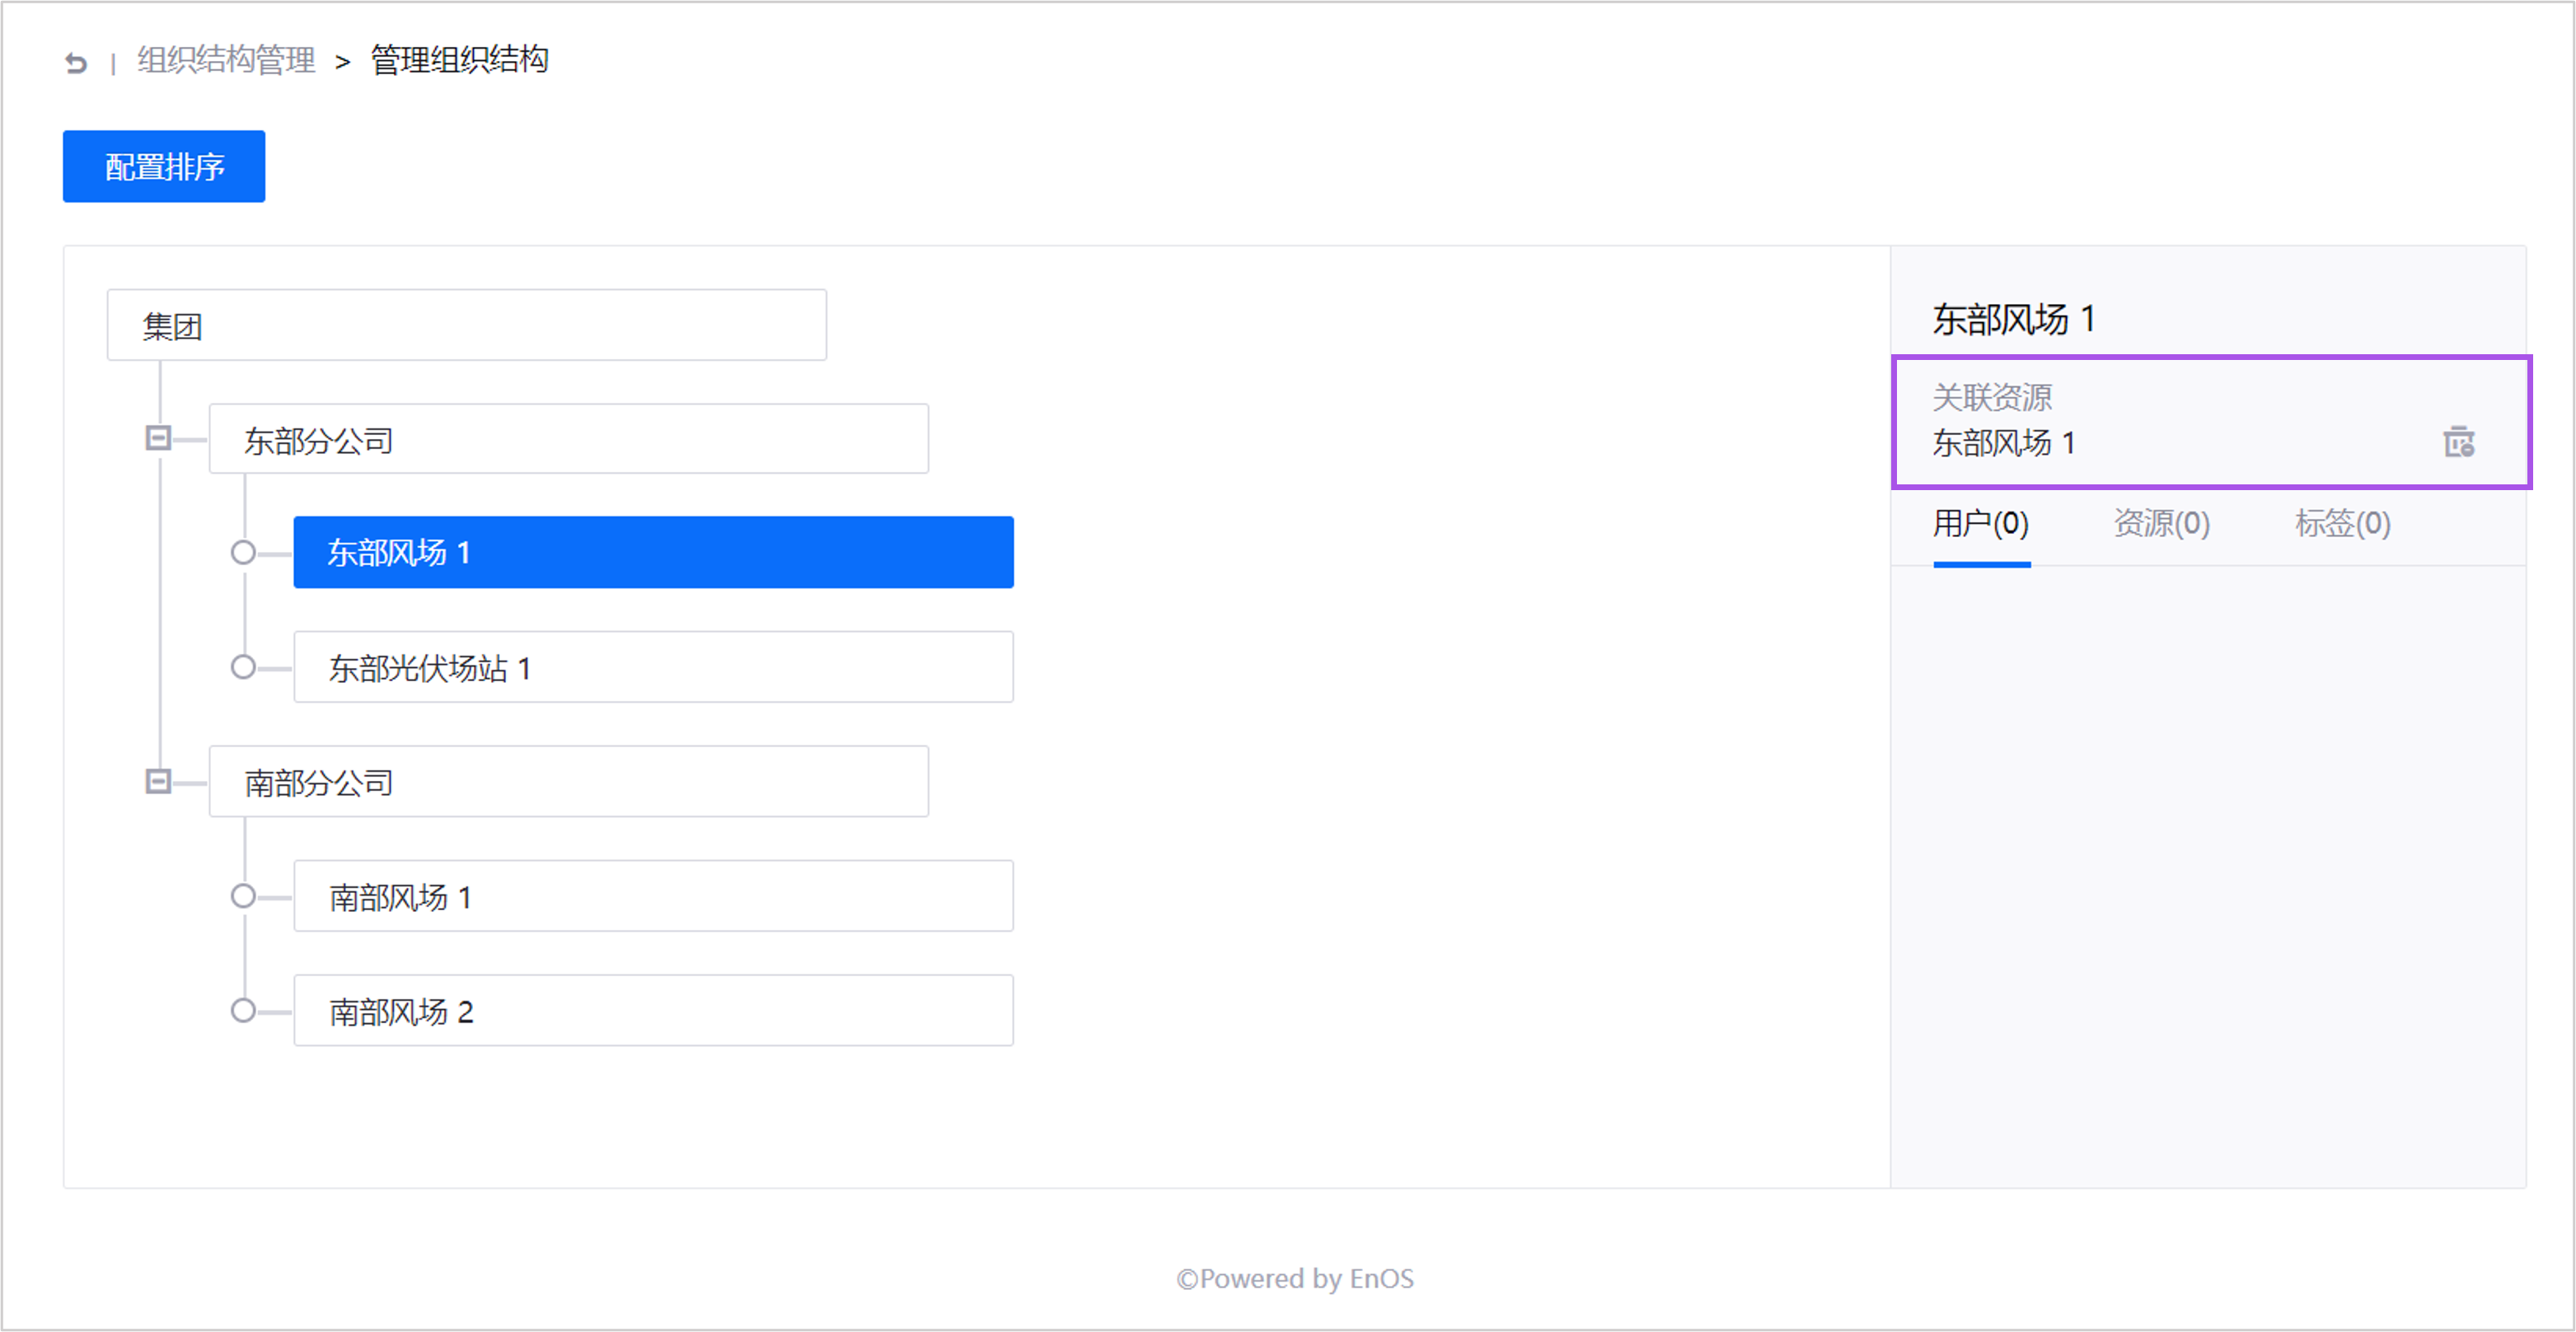
Once resources are associated with organization structure nodes, the nodes become mappings of real-world resources. For example, the “Eastern Wind Farm 1” node represents the actual “Eastern Wind Farm 1” power station. You can view associated resources in the Node Details panel on the right.
Step 3: Adding Resources
Follow these steps to add device assets (e.g., wind turbines, solar panels) to organization structure nodes and construct the organization’s asset topology:
Note
Each organization structure node can have multiple resources, but each resource can only be assigned to one node.
Log in to the EnOS Application Portal, click the Console icon
in the upper-right corner, and select Admin Console.In the left navigation pane of the Admin Console, select Organization Structure.
Select Manage
for the Group organization structure to open the Organization Structure Details page.Hover over the ellipsis (…) next to the
Eastern Wind Farm 1node and select Manage Resource to open the Manage Resources pop-up window.In the Manage Resources pop-up window, select Add Resource.
In the Select a Type field on the left, choose Physical Resource, and in the Search by Resource Name field on the right, select
WT-1andWT-2, then select Submit.Repeat the steps above to associate the corresponding resources with the following organization structure nodes.
Node Name
Resource
Southern Wind Farm 1
WT-3
WT-4Southern Wind Farm 2
WT-5
WT-6Eastern Solar Power Station 1
PV-1
PV-2
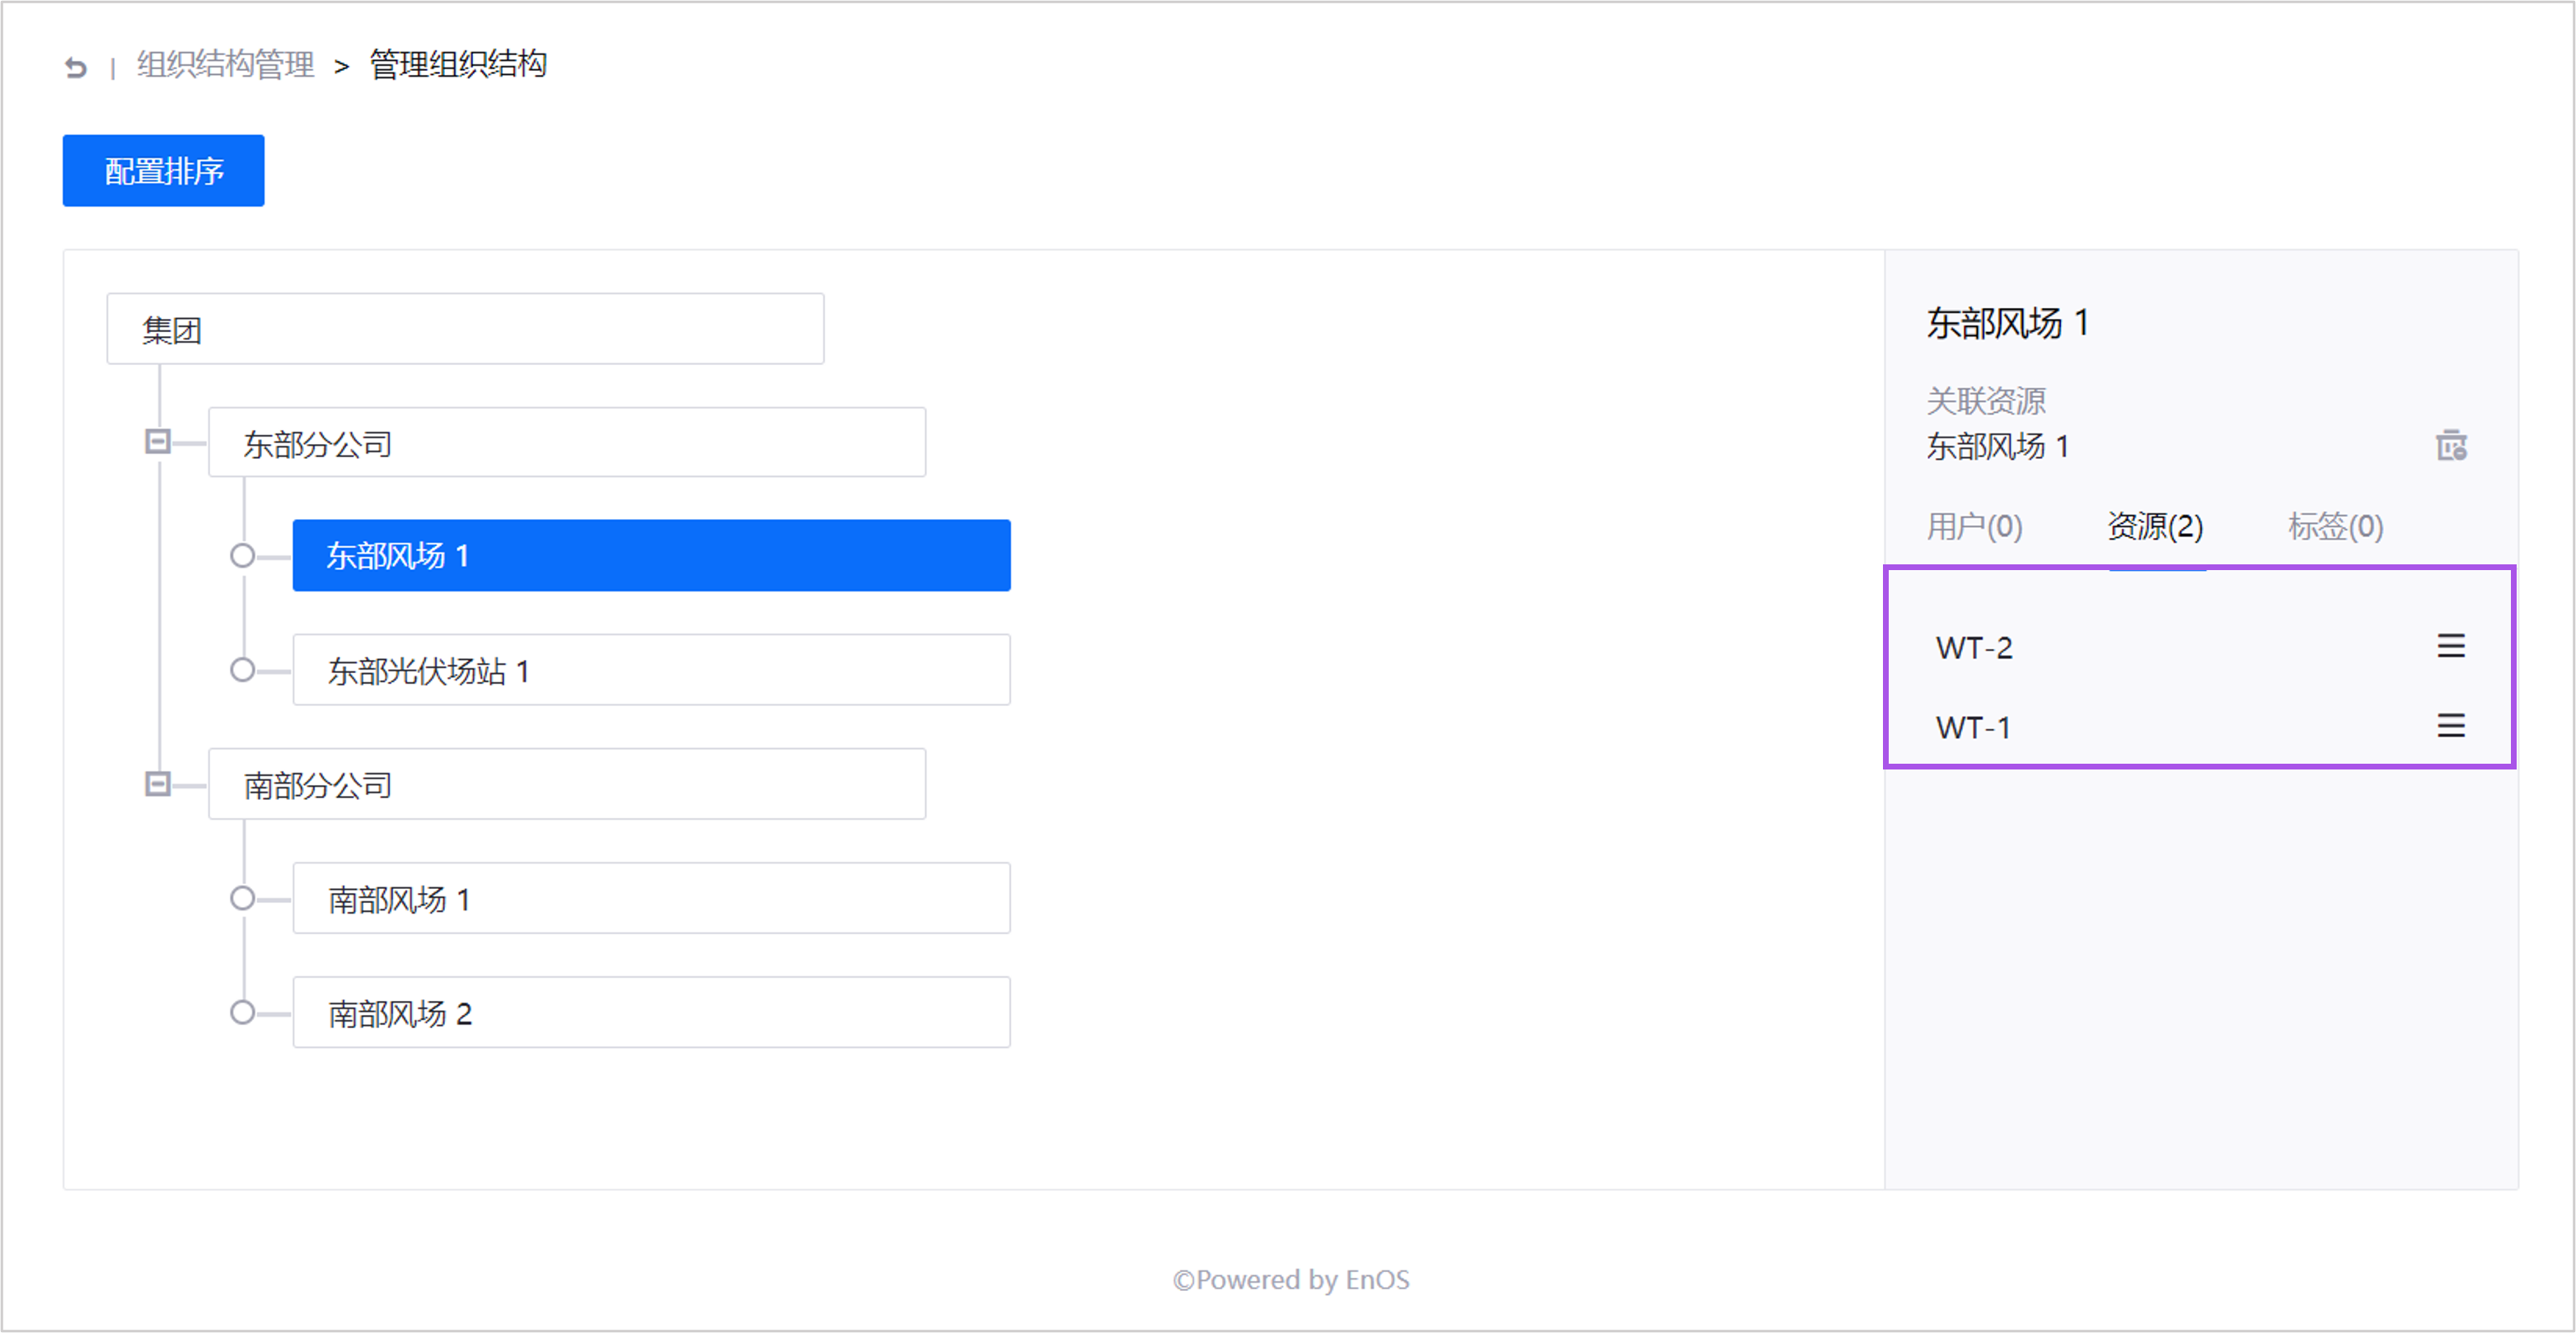
Adding resources to organization structure nodes defines ownership relationships. For example, adding “WT-1” and “WT-2” to the “Eastern Wind Farm 1” node means that these turbines belong to the “Eastern Wind Farm 1” power station in the real world. You can view added resources in the Resources tab of the Node Details panel on the right.
Step 4: Enabling Automatic Resource Authorization
By default, users can only access resources in their own nodes but cannot access resources in child nodes. Follow these steps to configure automatic authorization for an organization structure to automatically grant users in parent nodes access to resources in child nodes:
In the left navigation pane of the Admin Console, select Organization Structure.
In the organization list, enable the Automatic Resource Authorization toggle for the Group organization structure. Users in each node of this structure will automatically gain access to resources in child nodes.
Using “WT-1” and “WT-2” in “Eastern Wind Farm 1” as an example, the asset access permissions for users in relevant nodes are as follows when the Automatic Resource Authorization toggle is enabled or disabled.
Automatic Resource Authorization |
Asset Permissions |
|---|---|
Enabled |
|
Disabled |
|