Connecting Smart Devices to EnOS Cloud
This tutorial guides you through simulating a smart device’s direct connection to EnOS Cloud via EnOS Application Portal, sending data between the device and EnOS Cloud, and viewing device communication details.
Scenario Description
The connection scenario follows “Scenario 1.1” described in the Device Registration Methods.
About This Task
This example uses the integration of a user’s PV inverter as an illustration. For a real inverter to connect to the cloud, the device triplet must be burned into it during manufacturing. Once the inverter is powered on and connected to the network, it authenticates and connects to EnOS based on the device triplet. In this task, since there is no real device available, a device simulator will be used in the cloud to simulate the data transmission of a real device.
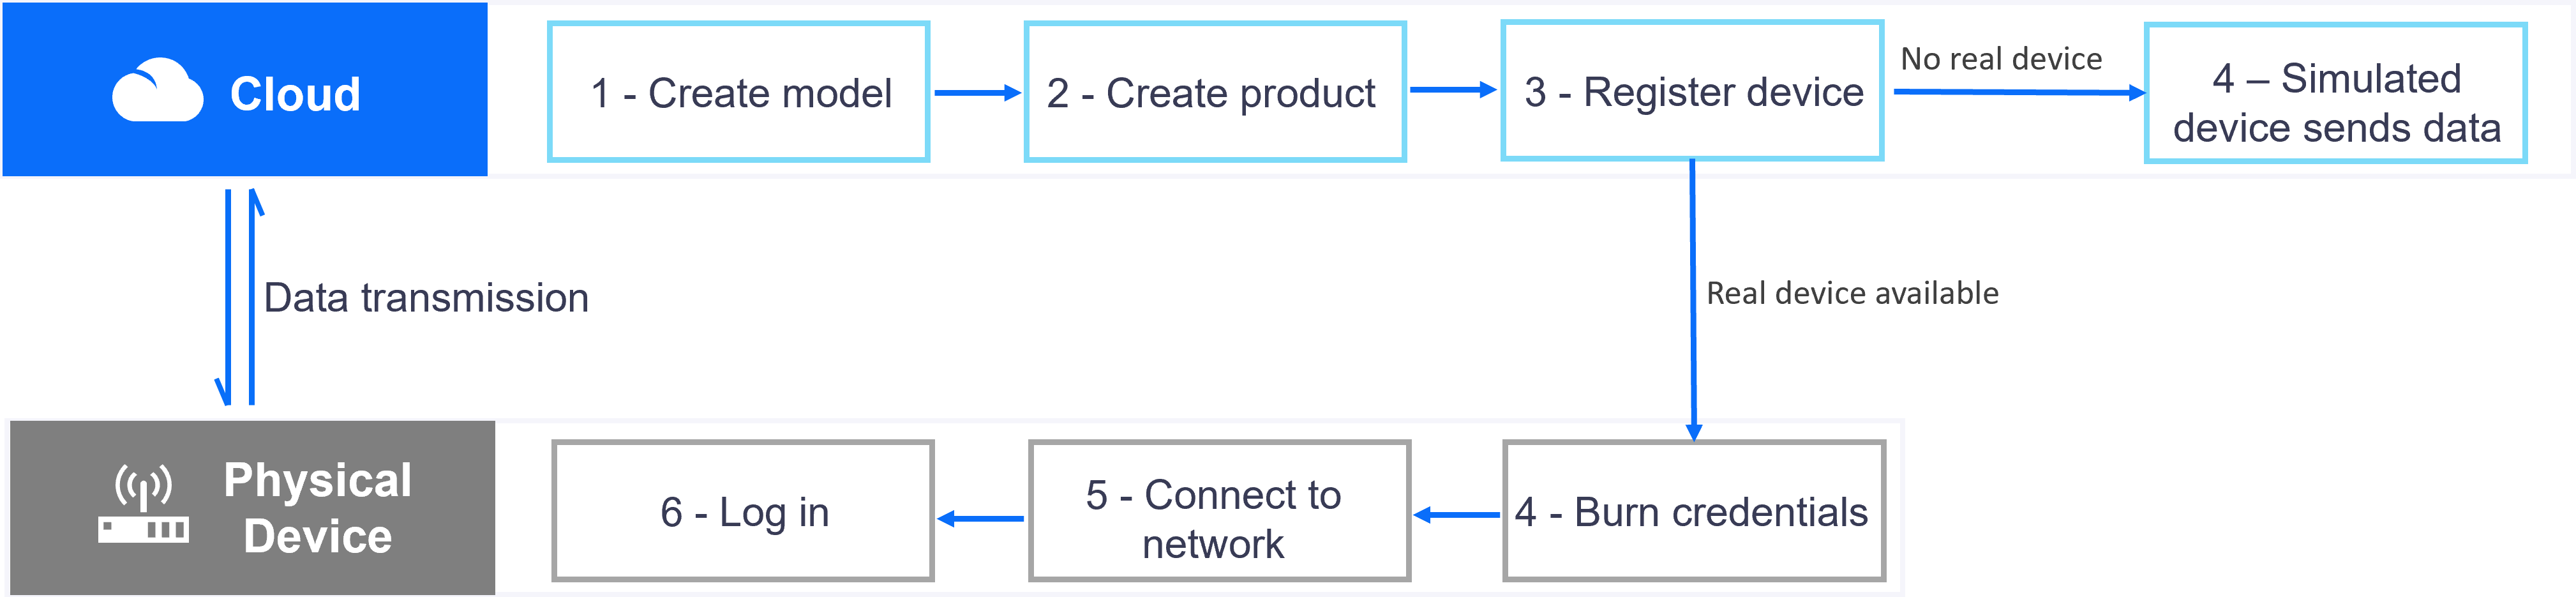
The task has the following steps:
Create a device model
Create a product
Register a device
Simulate data transmission using the device simulator
Check device connection status
View device data
Prerequisites
Your account must have the Developer role to access the Developer Console in EnOS Application Portal. Contact your OU administrator if required.
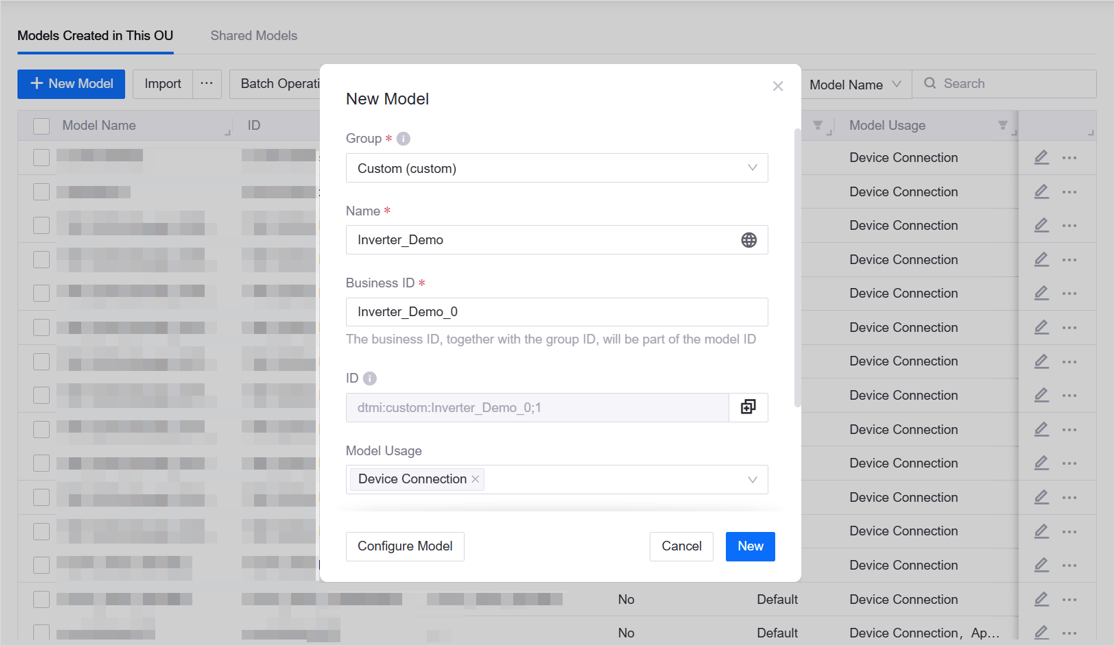
Step 1: Creating a Model
In EnOS Application Portal > Developer Console, navigate to Model Management > Models. Check if your OU has reusable models under Models Created in This OU or Shared Models matching the specifications below:
Feature Type |
Name |
Identifier |
Data Type |
Data Definition |
|---|---|---|---|---|
Attribute |
Inverter Type |
invType |
enum |
{0:Central,1:String} |
Attribute |
Component Capacity |
capacity |
float |
kWp |
Measurement Point |
Active Power |
INV.GenActivePW |
double |
kW |
If an identical model exists: Use it directly.
If a partially matching model exists: Create a new model by cloning or inheritance via Creating a Model.
If no reusable model exists: Creating a Model from Scratch with:
Group: Custom(custom)
Name: Inverter_Demo
Business Identifier: Inverter_Demo_0
Model Usage: Device Connection
Description: Inverter model for demo project
Note
Ensure Device Connection is selected under Model Usage. Otherwise, the model cannot be used for product creation/device registration.
2. On the model details page, check or create the following attributes and measurement points referring to Creating Model Elements:
Attribute 1
Category: Attribute
Name: Inverter Type
ID: invType
Data Type: enum
Enum Type: string
Enum Values:
Value: 0; Description: Central
Value: 1; Description: String
Default Value: None
Is Required: Yes
Is Writable: Yes
Attribute 2
Category: Attribute
Name: Component Capacity
ID: capacity
Data Type: float
Aggregation: sum
Unit: kWp
Default Value: None
Is Required: Yes
Is Writable: Yes
Measurement Point
Category: Measurement Point
Name: Active Power
ID: INV.GenActivePW
Point Type: AI
Data Type: double
Aggregation: sum
Unit: kW
Quality Indicator: No
Is Writable: Yes
After completing the model, proceed to create products and register devices.
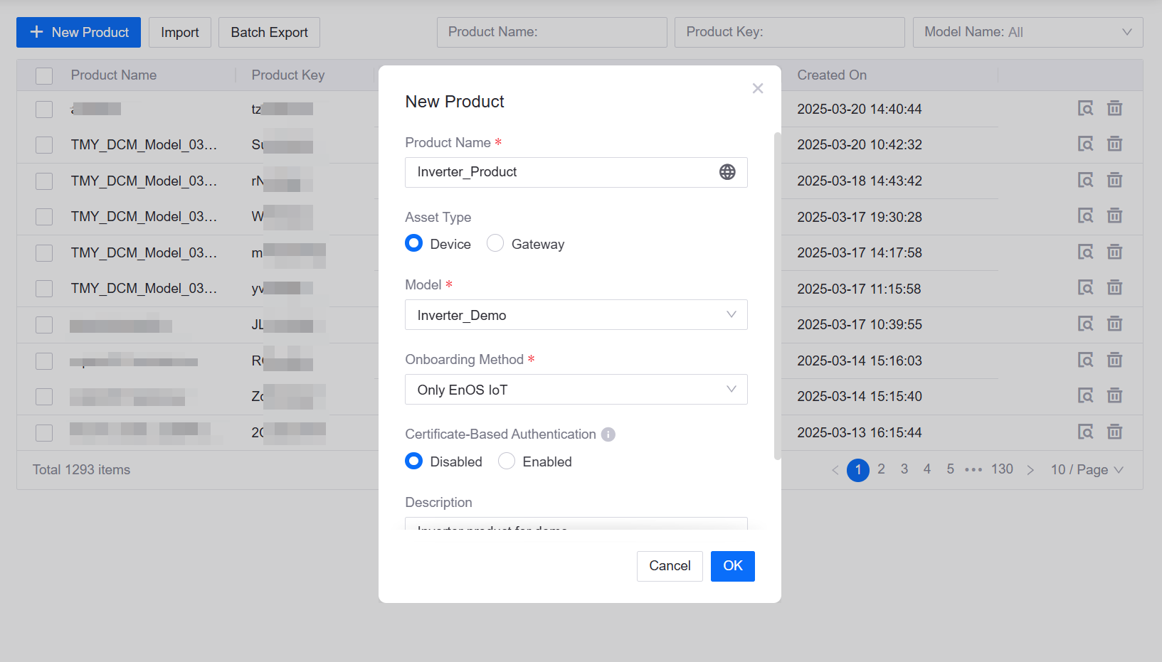
Step 2: Creating a Product
You need to create a product named Inverter_Product, which belongs to the Inverter_Demo model created in step 1. This tutorial assumes that devices of this product model transmit data using the EnOS IoT standard format, and the data transmission does not use CA certificate encryption.
In EnOS Application Portal > Developer Console, select Device Management > Products.
Click New Product, and provide the following settings in the New Product window:
Product Name: Inverter_Product
Asset Type: Device
Model: Inverter_Demo
Onboarding Method: Only EnOS IoT
Certificate-based Authentication: Disabled
Description: Inverter product for demo
Click OK to complete the operation.
For more information about products, see Creating a Product.
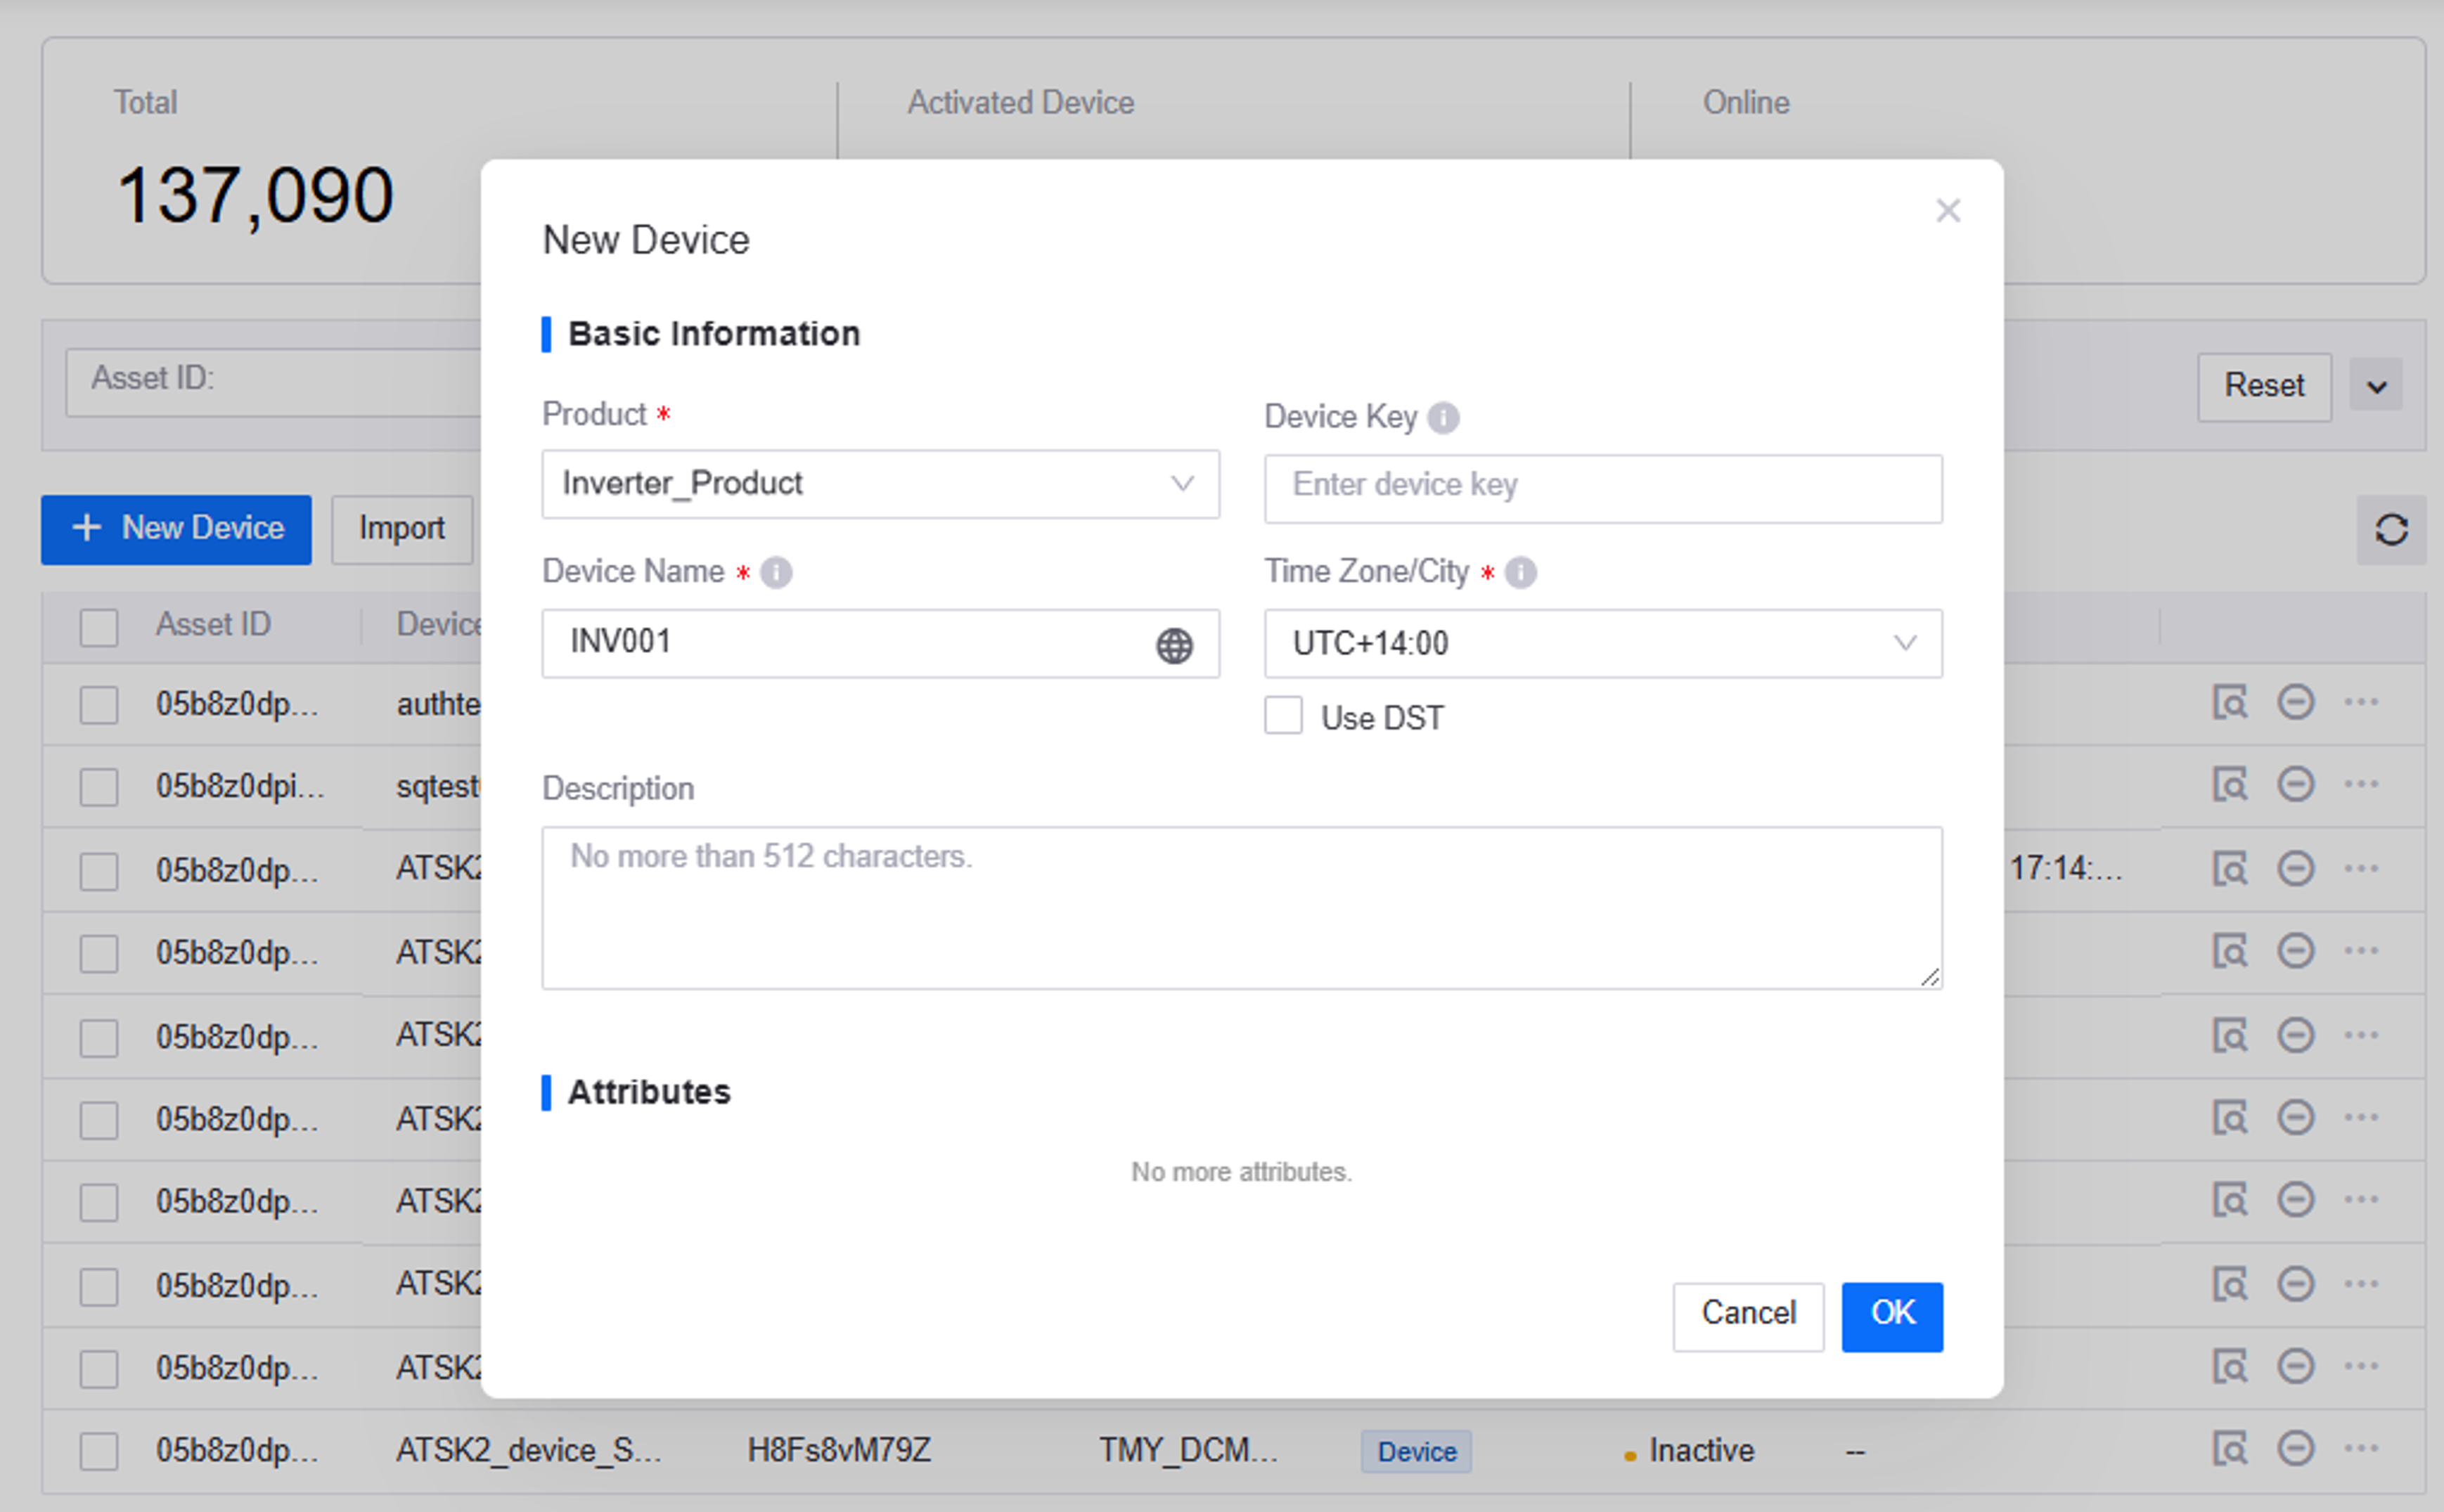
Step 3: Registering a Device
You need to create a device named INV001, which belongs to the Inverter_Product product created in step 2.
In EnOS Application Portal > Developer Console, select Device Management > Device Assets.
Click New Device, and provide the following settings in the New Device window:
Basic Information:
Product: Inverter_Product
Device Key: No need to fill in, automatically generated by the system.
Device Name: INV001
Time Zone/City: UTC+14:00
Attributes:
Inverter Type: 0:Central (centralized inverter)
Component Capacity: 5.0
Click OK to complete the operation.
After you complete the device registration, click  to retrieve the device triplet (
ProductKey, DeviceKey, DeviceSecret) from the device details page, which will be used in the following step.
For more information about devices, see Creating a Device.
Step 4: Simulating Data Transmission
Use the device simulator to send active power data to the cloud.
In EnOS Application Portal > Developer Console, go to Device Management > Simulators.
Click New Simulator, then select device INV001 created in the previous step from the list.
Click OK. The simulated device based on INV001 will appear in the simulated devices list.
Click Edit Sample
 , download the template.
Customize data for the measurement point
INV.GenActivePWin the file. For example:
timeOfDay |
INV.GenActivePW |
|---|---|
15:00:00 |
342.567 |
15:06:00 |
876.123 |
15:12:00 |
123.456 |
15:18:00 |
654.321 |
15:24:00 |
987.654 |
15:30:00 |
234.567 |
15:36:00 |
765.432 |
15:42:00 |
456.789 |
15:48:00 |
567.89 |
15:54:00 |
345.678 |
Here, timeOfDay represents the timestamp of the current day. The first data point will be sent at 15:00:00 today, with subsequent transmissions every 6 minutes for a total of 10 times. INV.GenActivePW is the measurement point ID.
6. After uploading the file, click Start  in the simulated devices list. The device will send data according to your configured schedule.
For more details, see Using Device Simulator.
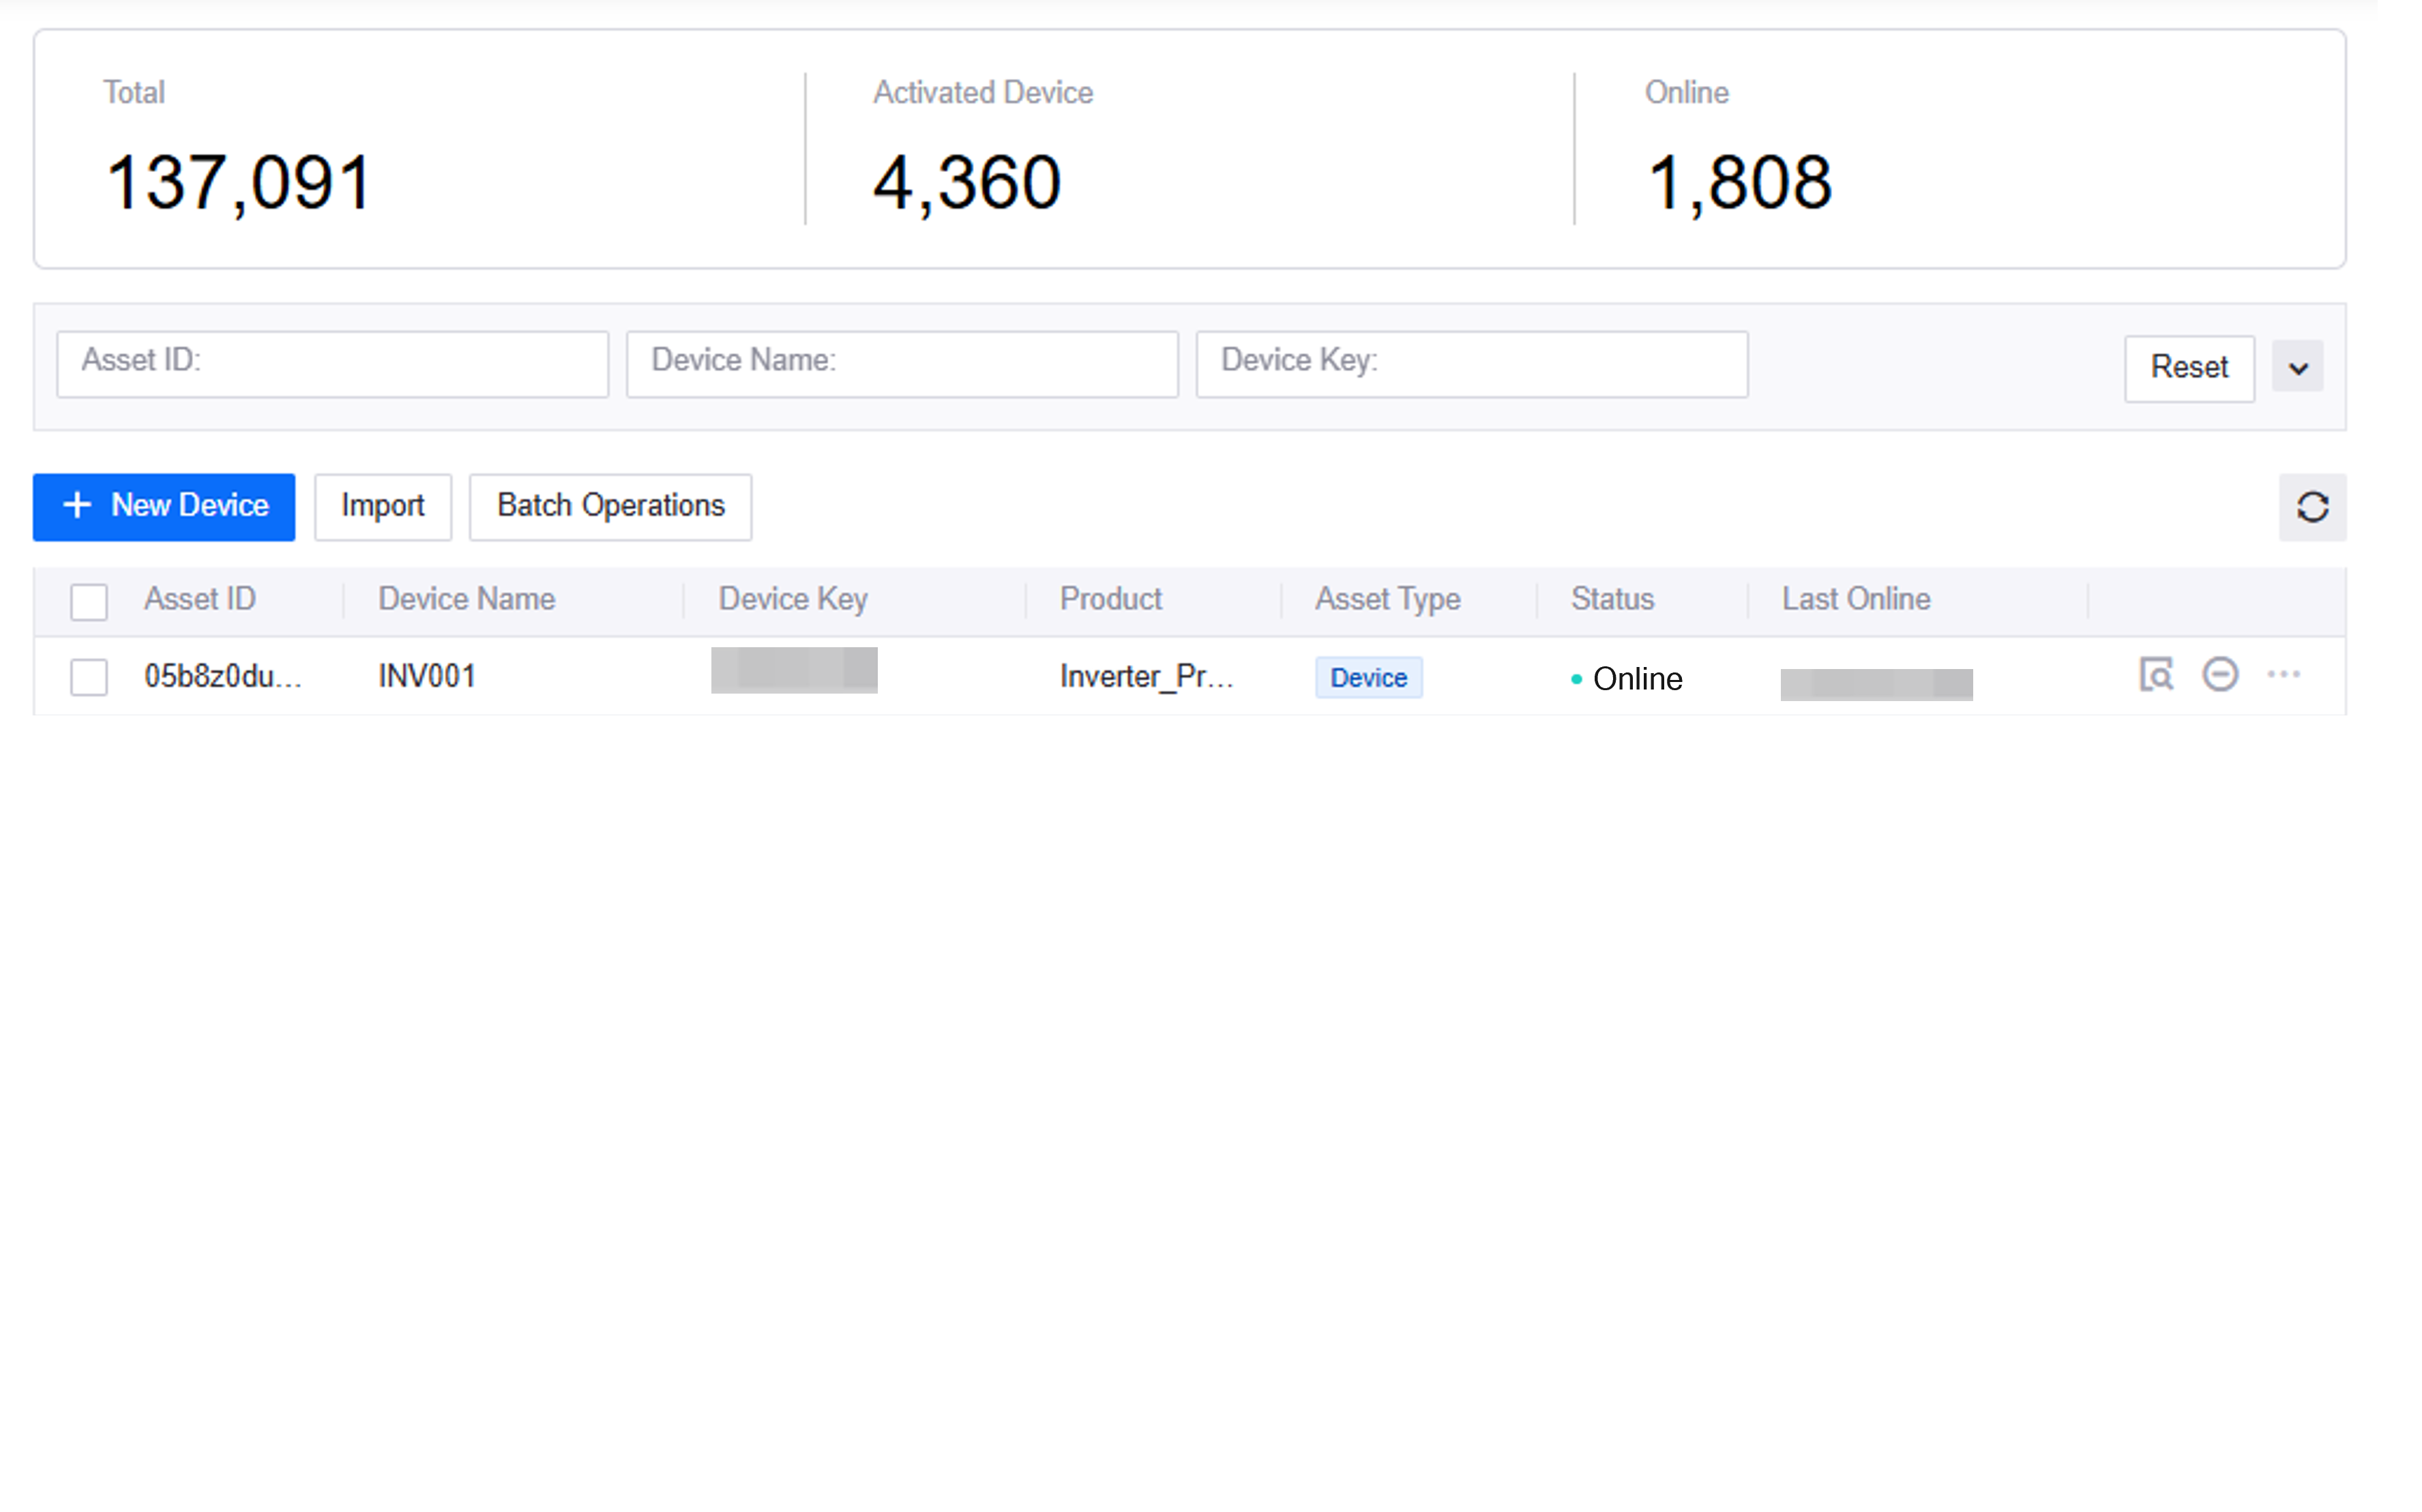
Step 5: Checking Device Connection Status
In EnOS Application Portal > Developer Console, click Device Management > Device Assets. Check the status of device INV001 in the device list.
During simulation, the device status will show as Online.
Step 6: Viewing Device Data
In the device list, locate device INV001 and click View
icon to access Device Details page.Click the Measurement Points tab, find the INV.GenActivePW measurement point, then click View Data to access the Data Insights page and view the latest data.
You can also retrieve the latest data via TSDB Data Service.