Creating Applications
Application developers can create applications in EnOS Application Portal for business functions. The created application can be used within the current OU or shared with other OUs. After the application is created, the system will generate a service account (including AccessKey and SecretKey), used to call EnOS APIs for data interaction and functional extension.
This page introduces in detail how to create an application, including creating a new application, adding menus, and configuring permissions, to provide you with a personalized application development experience.
Step 1: Creating a Application
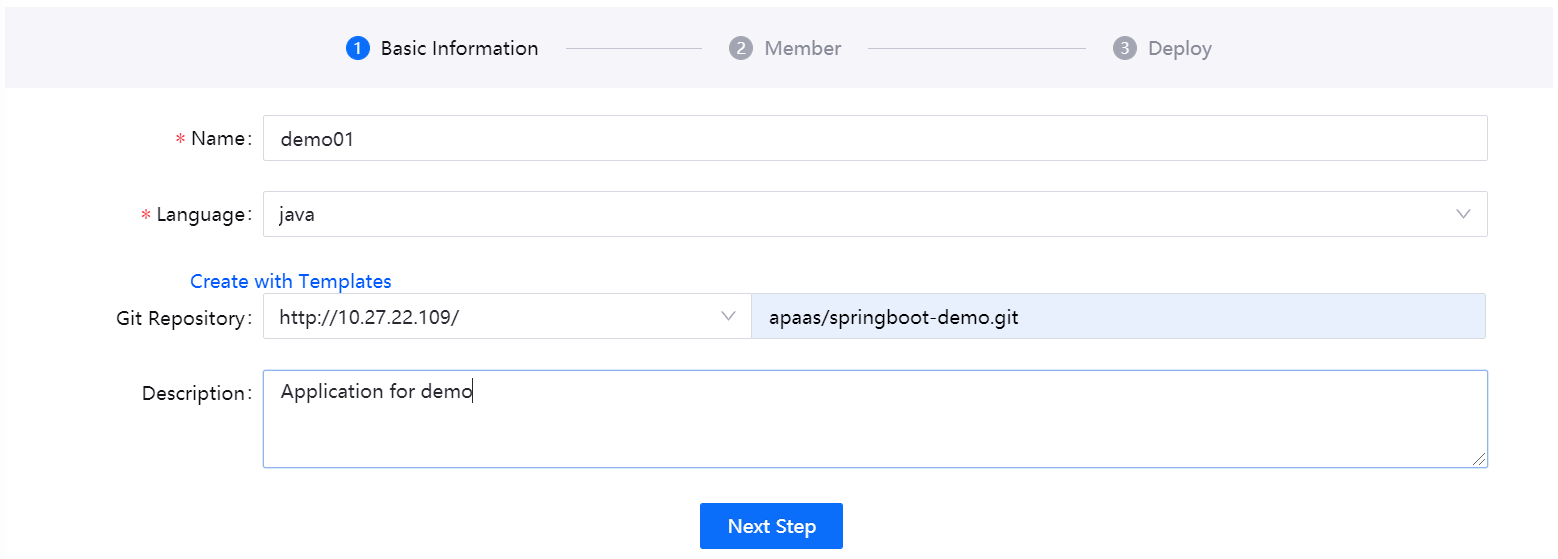
Log in to EnOS Application Portal > Developer Console, go to Application Registration, and select the Create Application button.
Enter the following fields in the Create Application window:
Field
Description
Name
The name of the application displayed in the terminal interface, supports internationalization.
Identifier
The identifier of the application, which will be displayed in the URL when the end user accesses the application. If not filled in, the identifier of the application will be empty.
URL
The access address of the application. If it is empty, the first menu will be entered by default when the end user accesses the application.
Category
Industry or field to which the application belongs.
Type
Select Web or Mobile.
Icon
Application Icon which will be displayed in the application registration list.
Description
Application Description will be displayed on the Application Details page.
Click Confirm to complete the application creation.
After the application is created, it will be displayed under the Apps of This OU tab, indicating that the application was created within the OU.
Step 2: Adding Menus
Log in to EnOS Application Portal > Developer Console, go to App Registration, select an application, and go to the App Details page.
Select the Menu tab, click Create Menu, and enter the following fields in the pop-up window:
Field
Description
Name
Menu Name. When the end user accesses the application, the application name will be displayed in the menu bar on the left side, supporting internationalization.
Identifier
Identifier of the menu, needs to be unique under this application.
Level
You can select Level 1 or Level 2.
Parent
If you select Level 2 in Level, you need to select its parent menu.
Sequence
Determines the sorting of the current menu in its level, taking an integer starting from 1. Menus with smaller numbers are at the top.
URL
The URL address of the menu, you can enter the native menu address of the CBBs, or fill in the third-party page address. You can only add URLs for level 2 menus.
Description
Description of menu, supports internationalization.
Click Confirm to complete the creation of the menu.
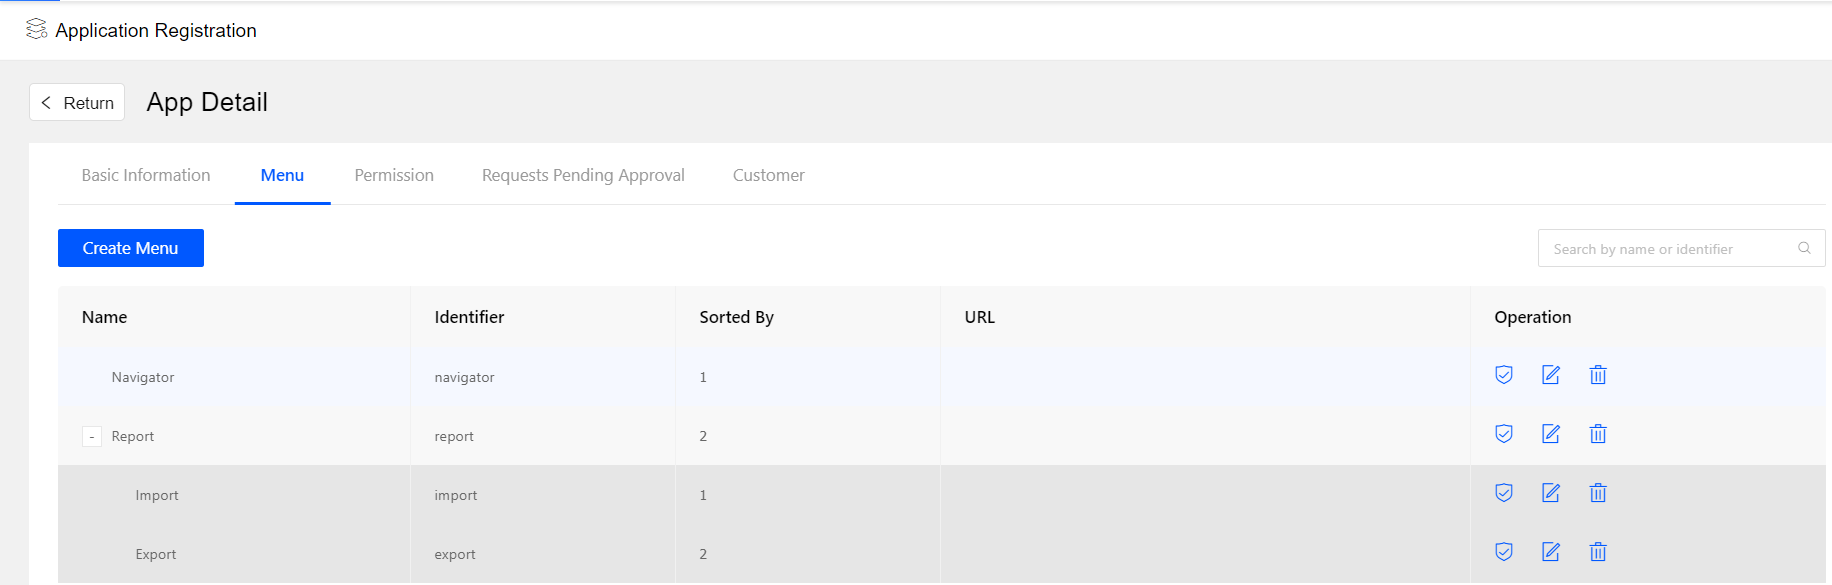
After adding a menu, you can view the menu list on the Menu tab of the application details. You can contact the OU administrator to create menu groups for the application, and assign menu groups by role to the application’s end users. For more information, see Managing Menu Groups.
Step 3 (Optional): Creating Permissions
Permissions are used to implement access control of fine-grained functions in the application, such as restricting only specific users from performing operations such as “creating records” or “deleting data”. By configuring permissions, application developers can set access permissions for the application’s functions and combine them with role assignments to ensure that end users can only access their authorized functions.
Log in to EnOS Application Portal > Developer Console, go to Application Registration, select an application, and go to the Application Details page.
On the Permission tab, select Create Permission.
Fill in the pop-up window with the name, identifier and description of the permission.
Name: The display name of the permission, such as “Create Record” or “Delete Data”, supports internationalization.
Identifier: A unique identifier for a permission that is used to reference in code, such as create_record or delete_data.
Description: Functional description of permissions, such as “Allow users to create new data records”, supports internationalization.
Note
If the application uses the native menu of CBBs, first you need to Creating an Application Shortcut, and add Pre-defined Permissions of CBBs to the application shortcut.
If the application contains self-developed pages or third-party pages, you need to check whether the user has the corresponding permissions in the front-end or back-end code of the page.
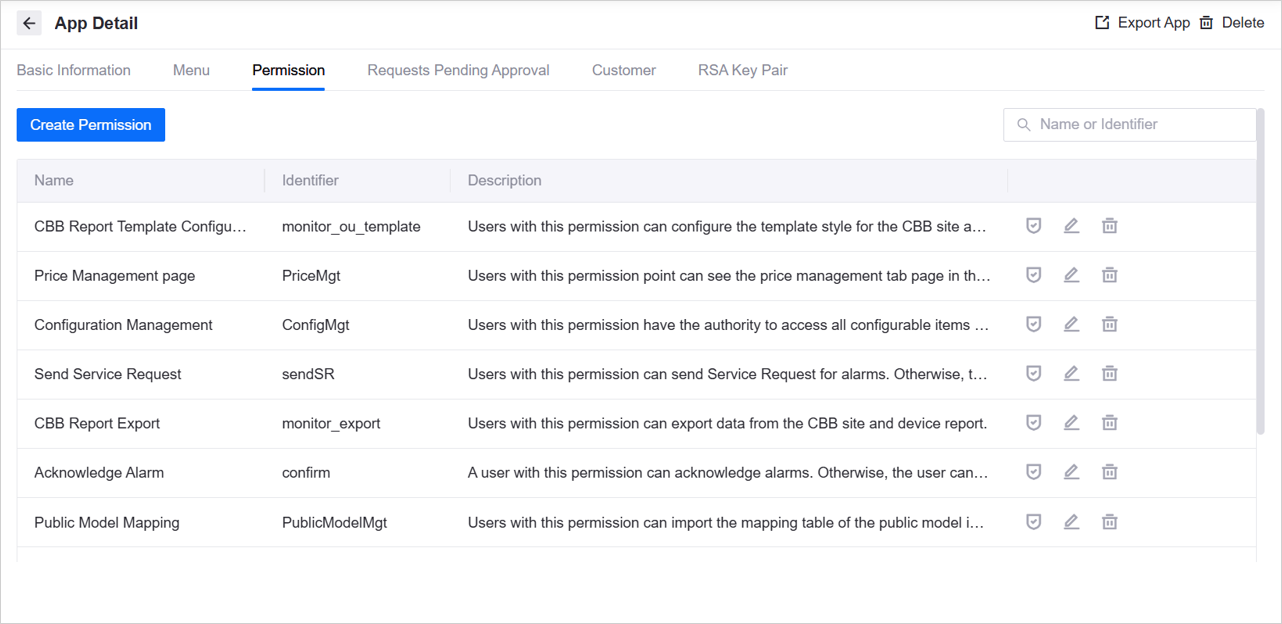
After the configuration is complete, you can view the list of permissions on the Permission page. You can contact the OU administrator to assign permissions to the end users by role. For more information, see Managing Roles.
Step 4 (Optional): Creating an RSA Key Pair
Each application can have an RSA key pair, which consists of an RSA public key and an RSA private key. When application developers obtain product secret and device secret using Connection Service V2.4 API, the returned parameter value is encrypted and needs to be decrypted using the RSA private key. For more information on decryption, see Decrypting Product/Device Secret.
If necessary, follow these steps to create an RSA key pair for the application.
Note
Keep the private key and private key password properly, and cannot be restored after loss.
Log in to EnOS Application Portal > Developer Console and enter Application Registration.
Click the application card to enter the Application Details page and enter the RSA Key Pair page.
Click Create Key Pair, and the RSA key pair will be automatically generated. If necessary, you can set the Private Key Password to encrypt the private key. The private key password needs to be properly saved and the page will no longer be displayed. If not, leave it blank directly.
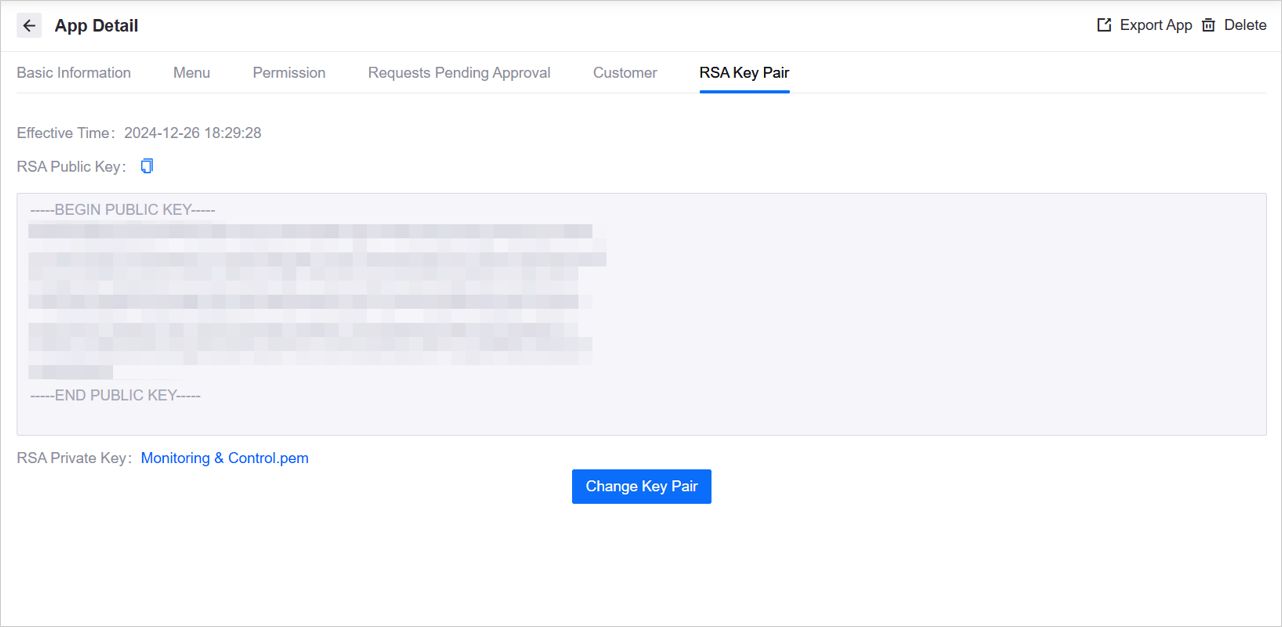
After creation, you can view the RSA public and private keys on the RSA Key Pair tab.
Effective Time: The time when the RSA key pair was created or replaced.
RSA Public Key: Click Copy
 to copy the public key.
RSA private key: Click on the private key file name (for example
Monitoring & Control.pem) to download the private key file. If the private key password is configured, the downloaded private key needs be used with Private Key Password.